 Close Topic Options
| Wangan Midnight Expressway · Forum Guidelines | Donation · Gallery · Soundtracks · Help · Search · Members · Calendar |
| Welcome Guest ( Log In | Register ) | Resend Validation Email |
| 24 Pages |
   |
Thread Rating: 2 votes, 5.00 average. Rate:
 Oddmanout84's Z build, Not your Devil Z
| Oddmanout84 |
Posted: Feb 12 2009, 10:16 AM
|
|
Resident Alcoholic           Group: Advanced Members Posts: 1,033 Member No.: 3,693 Joined: Sep 25th 2008 Location: My garage, waiting for overnight part from JP |
Progress is a beautiful thing.
After having a huge hassle hooking up the brakes (wrong fittings supplied with rear brake lines, had to source the right one from Summit), I finally bled all the hydraulic systems and was ready to take the Z out for the first time in 6 months. The E-brake cables were waaaaay too long to fit on the 240sx calipers, so I did what most people did with this conversion and crossed the cables to the opposite sides. Then I crossed them again. And again. And again.... Lol, from what I've read on other builds, they only had to cross the cables over ONCE! However, mine were so long that I had to swap them over 4 times. It looks like there's a damn twizzler under my car. And they're still a bit too long, as pulling the handle only slightly engages the rear brakes. Hopefully there's a nut under there somewhere where I can adjust the tension on the line. That being done I lowered the car onto her wheels and decided to do the smart thing; Take a test drive up and down an unlit driveway at 1am with no lighting on the car whatsoever. It worked, but I think I enjoyed the test drive this afternoon more. Those JDM fender mirrors are mounted correctly, but their field of view is far from optimal. They give a great view of the sky above and behind me, but not much else. Their adjustments are not enough to bring the view downward enough. I'm 5'9", so its not like I'm a midget craning to see over the steering wheel. I think I'll try installing some shims at the fwd portions of the mirror mounts to decrease the angle they're sitting at. Hopefully this works, as even though they were reasonably priced (for fender mirrors), they were still damn expensive and I like the style they add to the Z too much to remove them. Now that this is just about over with though, I can start focusing all my effort on the interior. The underside of the car is just about done, with maybe a few minor tweaks needed. I've chipped away nearly all of the sound deadening tar crap so its just about time to clean up the surfaces and lay down a new coat of rust preventing paint (and some 3M rubberized undercoat for the floors). This next part will make many of you cringe (and I'm cringing at the thought too), but there is a small hole on my passenger floorpan. I'm going to be fiberglassing it, because I don't have the means to weld it. Don't worry!! Its temporary! I hate the idea too, but I don't have much of a choice... Until the Z is roadworthy enough to where I can drive to my uncle's house (he has a welder), I need a temp fix. I'm breaking out the fiberglass anyway to fill the old mirror holes on the doors, and to shave the rear bumper. And all the filler is fiberglass reinforced waterproof. Globerunner seems to have done a really good job with the stuff in the past, so I'm going to try following in his footsteps. 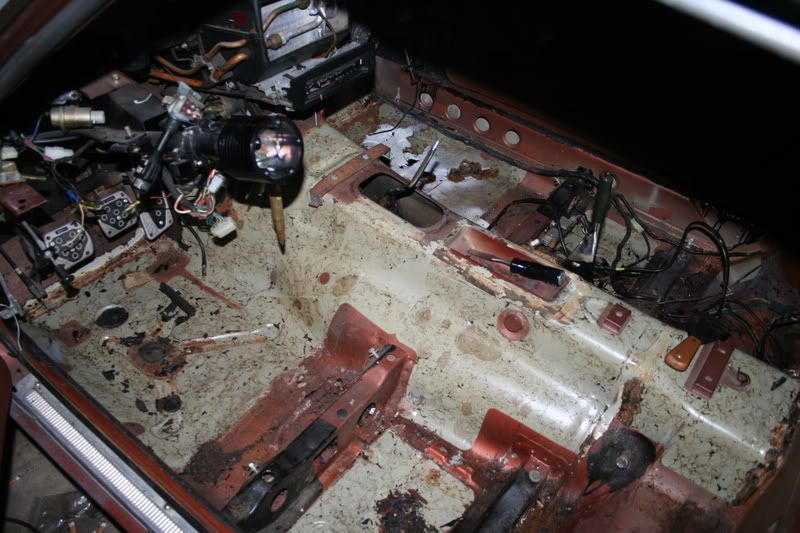 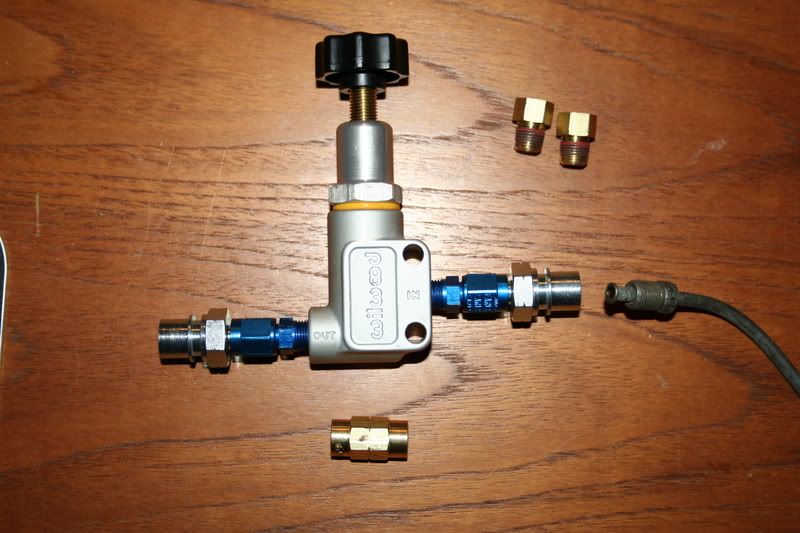 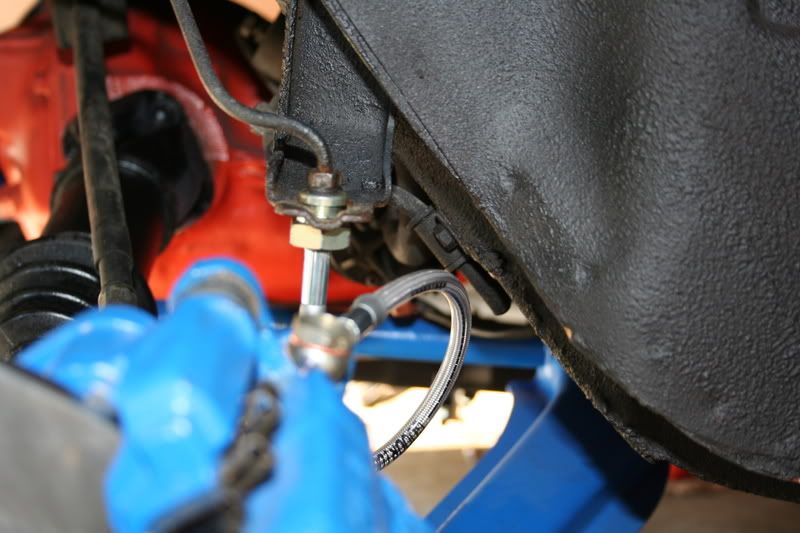 I will post more pics when the process begins... |
| Oddmanout84 |
Posted: Feb 12 2009, 05:00 PM
|
||
|
Resident Alcoholic           Group: Advanced Members Posts: 1,033 Member No.: 3,693 Joined: Sep 25th 2008 Location: My garage, waiting for overnight part from JP |
Spoke too soon. One look at the FSM and there it is... a nut for adjusting cable tension. [ Post merged on Feb 13 2009, 08:46 AM ] Since I started this project in August, I've had an early ZX turbo L6 sitting in my garage. When I was just starting to undertake this "labor of love" in doing a performance resto on my Z, the prospect of a turbocharged engine swap excited me. So much so that I went through great pains to find one locally, which cost me $800 because it had to be removed from a donor car by the man who helped me find it. Although the motor looks to be mechanically sound from when I partially disassembled it, the PO appeared to have tried a half-attempted rebuild. He could not get the motor to run afterwords, and hence the car sat, and subsequently was sold. The problem was likely electrical. I received almost everything, wiring harness and all, except for the computer (MIA) and the crank angle sensor. The car was auto, so there was no clutch/flywheel included. Other than that, I was pleased. Months have gone by, and the motor is still sitting in the same spot in my garage, untouched save for the various extremities that I removed and set aside so I could remove the head from the block. Oh, I guess I forgot the one thing that was screwed up. Some goober crossthreaded the #1 spark plug. Not incredibly terrible. But as my project has progressed, all I can do every time I look at, step over, or touch the motor when I have to move something near it, is get an overwhelming sense of regret. If anything, it will be a long time before I even attempt to swap it into my Z. The fact that I just got the original equipment running has been an odyssey in itself, I don't even want to think about breaking everything again. That and fixing the rest of the car has become rather... costly. Add to that the fact that I'd want to FULLY rebuild the turbo motor and do everything right, and the money + time keeps adding up. Don't get me wrong, I still love the idea of turboing my car, its just with everything else that's piling up its pushing that endeavor further and further back in line. I'm having difficulty deciding now; do I sell the motor and get something later down the road? Or do I sit on it for a later time, maybe using some of the parts as spares in the mean time? As such I flatly refuse to display any sort of HybridZ sticker or emblem on my car until said named swap is completed. It just seems wrong to do so otherwise. Taking that further, maybe my car shouldn't even be posted on this forum... yet. I'm at a loss. My overzealousness at the conception of this project got the better of me. If I get any worthy offers for local pickup, I may just give in and sell it, and find something else down the road... |
||
| Oddmanout84 |
Posted: Feb 22 2009, 10:14 AM
|
|
Resident Alcoholic           Group: Advanced Members Posts: 1,033 Member No.: 3,693 Joined: Sep 25th 2008 Location: My garage, waiting for overnight part from JP |
Here's a prime example of what not to do with rust holes:
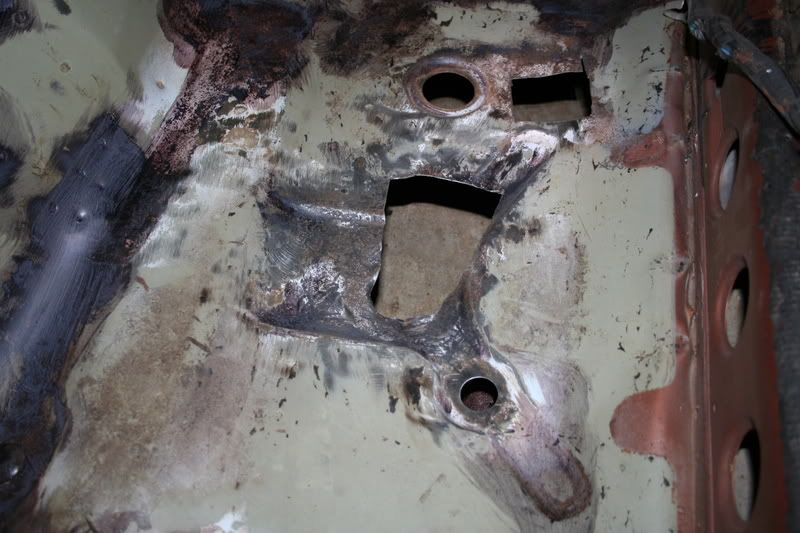 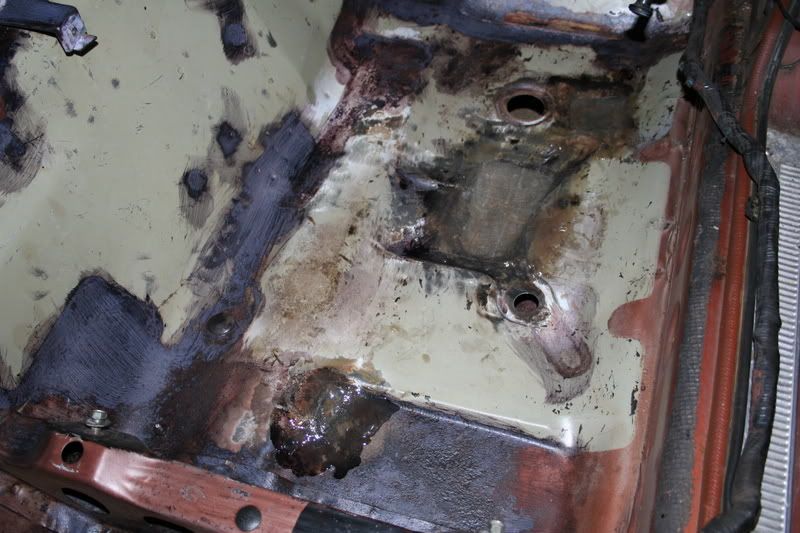 Yes, that is fiberglass. And no, I'm not proud of it. The only consolation I have for myself is that its temporary. At this time, its one of the things I need to get the car back on the road. If I didn't do something, I'd be ruining the refurbished interior that I've been working so hard lately to fix (though maybe not as hard as AK Z's |
| AK-Z |
Posted: Feb 22 2009, 01:18 PM
|
|
Grumpy old guy :p           Group: Advanced Members Posts: 806 Member No.: 206 Joined: Jun 5th 2007 Location: Update Profile |
I take it that you have some brake upgrade in stored with that proportioning valve.
Floor looks good. Just expect to replace it in the future. Remember what mull found in his first vid |
| Oddmanout84 |
Posted: Feb 22 2009, 02:08 PM
|
||
|
Resident Alcoholic           Group: Advanced Members Posts: 1,033 Member No.: 3,693 Joined: Sep 25th 2008 Location: My garage, waiting for overnight part from JP |
Yup! And yes, the rear brakes were swapped for a disc setup using 240sx calipers and 300ZX rotors (Modern Motorsport kit). Its funny though, because the diameter of the rear discs dwarfs the front. |
||
| Oddmanout84 |
Posted: Feb 23 2009, 08:19 PM
|
|
Resident Alcoholic           Group: Advanced Members Posts: 1,033 Member No.: 3,693 Joined: Sep 25th 2008 Location: My garage, waiting for overnight part from JP |
Last night I finally removed the Z's rear seat.
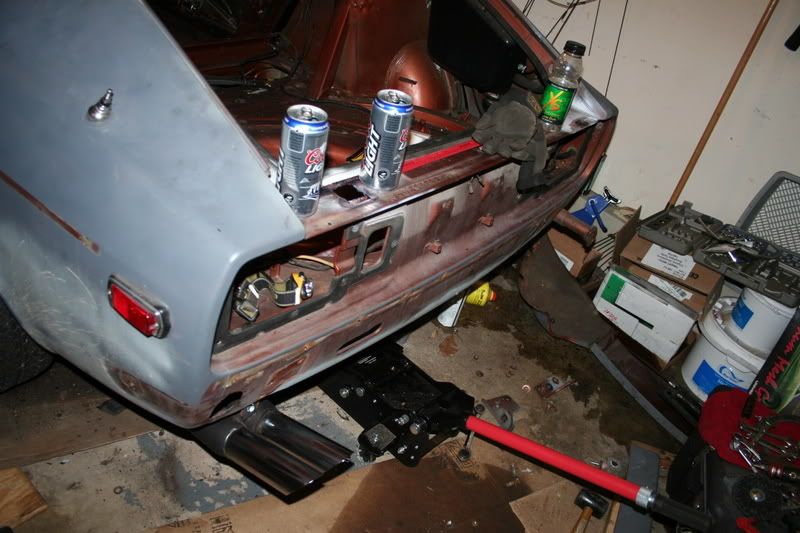 Look how far the twice pipes stick out. I could skewer a small child with that, and cook 'em at the same time too. Great solutions for when I get hungry on the road. |
| TexasDemonZ |
Posted: Feb 27 2009, 10:09 AM
|
||
|
Request Title - PM Mods           Group: Members Posts: 421 Member No.: 2,359 Joined: Mar 6th 2008 Location: Austin, TX |
Lol, that looks familiar......    |
||
| AK-Z |
Posted: Feb 27 2009, 01:15 PM
|
|
Grumpy old guy :p           Group: Advanced Members Posts: 806 Member No.: 206 Joined: Jun 5th 2007 Location: Update Profile |
240z tail lights. nice
|
| Oddmanout84 |
Posted: Feb 27 2009, 01:32 PM
|
|
Resident Alcoholic           Group: Advanced Members Posts: 1,033 Member No.: 3,693 Joined: Sep 25th 2008 Location: My garage, waiting for overnight part from JP |
Your twice pipes are installed MUCH better than mine, lol. I see you also replaced a few bulbs on your tail lights with LED units. How well do they work? I've been considering it myself since I got an LED dome light bulb/kit/thing, but I've held off because I don't know how well the light will spread inside the casing (ie, I don't want a couple bright dots, but rather an even bright light inside).
[ Post merged on Feb 27 2009, 06:00 PM ] Obviously I have almost no ability to focus on a single project with this car. 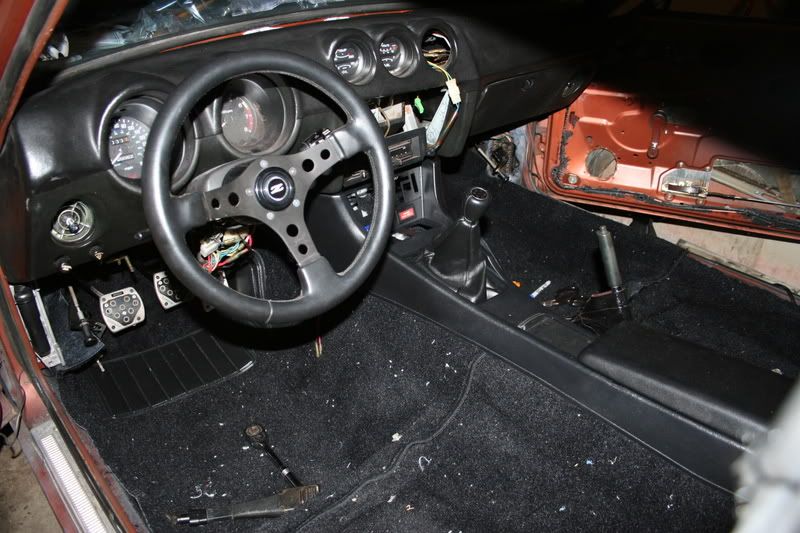 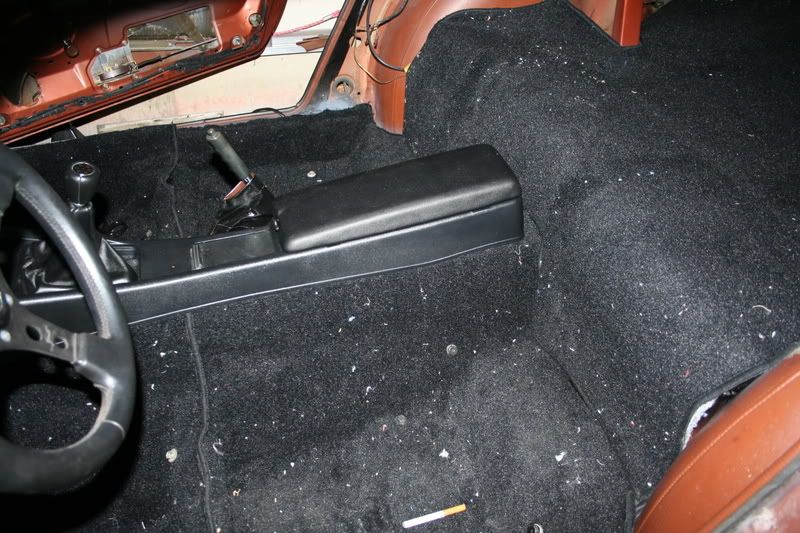 It took a few days and was a total b*tch and a half to do, but my new carpet is is for the most part, along with the dash, new center console, shift boot, etc. I'm not done trimming the carpet, as you can see, and its not tacked down to the body in any way (besides the holes I cut for bolts). I almost that this was a sectional kit, and not a molded one. Really, quite a bit of work involved especially since there were so many holes that I needed to nervously and carefully cut in all the right places. The rear deck, pillars and roof all need to be de-browned before I'm really "finished". As you can see, the carpet is nowhere near clean, and has chunks of joot padding all over the f*cking place. No, that is not a "cigarette" at the bottom of the second picture. After 6 years of killing my lungs, I've finally wussed out and bought one of those "e-cigs". So far today its done its job and kept me from freaking out, and its allowed me to "smoke" and work on the car at the same time without fear of stinking up my brand new stuff. With luck in a few days I'll start hacking up brown stuff as my lungs begin to clean themselves again. Wheee!! Fun times! |
| Oddmanout84 |
Posted: Mar 11 2009, 07:02 PM
|
|
Resident Alcoholic           Group: Advanced Members Posts: 1,033 Member No.: 3,693 Joined: Sep 25th 2008 Location: My garage, waiting for overnight part from JP |
New goodies!
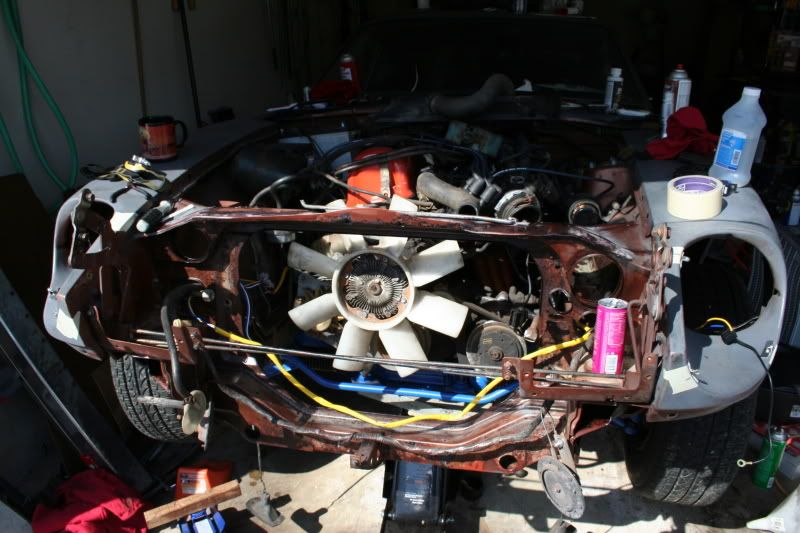 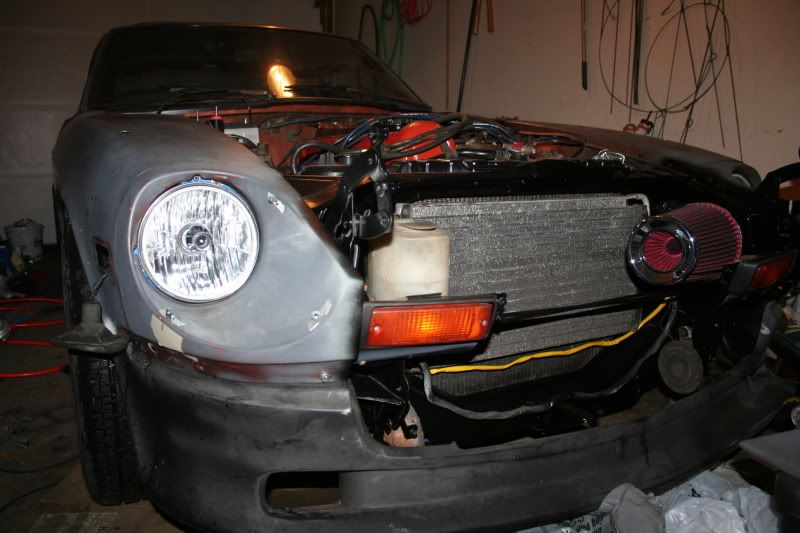 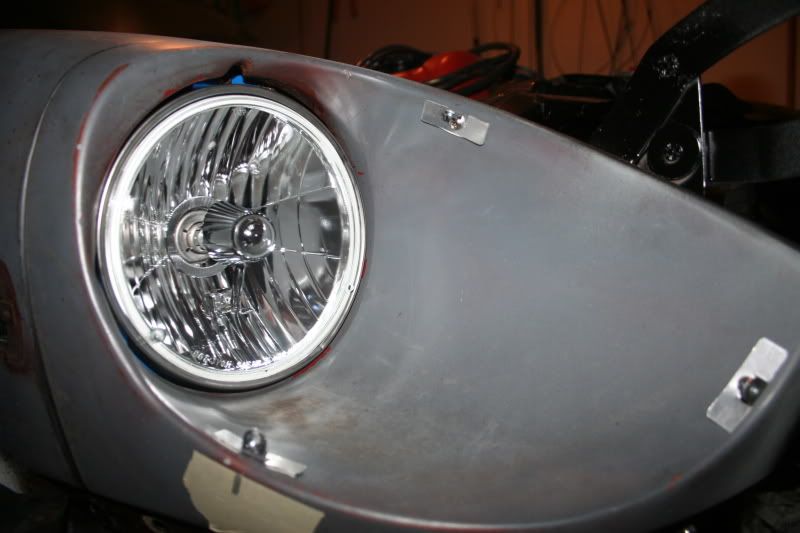 Easily wired in, new MSR casings and an upgraded headlight relay harness from Blackdragon to improve headlight intensity and reduce wear on my combo switch (which had a little bit of meltage starting on the inside when I inspected it). I'm thoroughly impressed with it, and have had no issues that several whiners have complained about, i.e. "Waaaa! I had to cut the harness to make it fit and then my headlights started burning out and they had too much glare!". These headlights have almost NO glare, and are the next best thing to projectors as far as I'm concerned. I met some guy at autozone a while ago who had the typical "ebay" casings on his Z. The difference is astronomical. His sucked, mine don't. The harness is also easy to install with no cutting or splicing. You just have to disconnect the connectors (that ultimately connect to your lights) in order to feed them through the headlight bucket, easily done with a pick or a jeweler's flathead. The bulbs in the car are NOT HID, unfortunately, just bright-ass halogens. I will definitely cross that bridge when I come to it though, I just wanted to test the casings before I dumped money on HIDs, then found out that I'd have to get projector lenses instead. |
| MaikazeFD3S |
Posted: Mar 12 2009, 02:25 AM
|
|
WME King Tiger           Group: Advanced Members Posts: 2,533 Member No.: 3,055 Joined: Jun 13th 2008 Location: Update Profile |
Woo! Updates, keep them coming!
|
| JDMMA70 |
Posted: Mar 12 2009, 06:48 AM
|
|
Request Title - PM Mods           Group: Advanced Members Posts: 786 Member No.: 123 Joined: Apr 7th 2007 Location: Houston, TX |
Are those Hellas? Or Cibies?
|
| Oddmanout84 |
Posted: Mar 12 2009, 08:19 AM
|
||
|
Resident Alcoholic           Group: Advanced Members Posts: 1,033 Member No.: 3,693 Joined: Sep 25th 2008 Location: My garage, waiting for overnight part from JP |
You know, I have no idea. They weren't labled except for "Crystal Clear Headlight-7" Taiwan" on a small decal showing the part number on the box. Got them from Black Dragon Automotive (aka Victoria British), where they're advertised as "Euro Style Headlights". Despite the dubious nature of their origins, they seems to be pretty good quality. |
||
| TexasDemonZ |
Posted: Mar 16 2009, 10:18 AM
|
||
|
Request Title - PM Mods           Group: Members Posts: 421 Member No.: 2,359 Joined: Mar 6th 2008 Location: Austin, TX |
They're generic 7" round retrofit headlight housing/lenses and a 9003 (h4 for motorcycles) bulb in the back. I have a set myself. If the actual bulbs came with the retrofit lens/housing, then odds are the bulb is an Eiko as those are the cheapest ones. Could be an osram/sylvania possibly, but I doubt it. I dont know who makes Black Dragons retrofit headlight Lens/housing. But pretty much every brand looks/works the same. This post has been edited by TexasDemonZ on Mar 16 2009, 03:12 PM |
||
| JDMMA70 |
Posted: Mar 16 2009, 10:25 AM
|
||
|
Request Title - PM Mods           Group: Advanced Members Posts: 786 Member No.: 123 Joined: Apr 7th 2007 Location: Houston, TX |
Got a pic of the beam pattern against a wall? From looking at the pictures they look like they have the lens pattern of Hellas so i wonder if they are replicas. In my experiance ive had bad luck with generic headlamps This post has been edited by JDMMA70 on Mar 16 2009, 10:26 AM |
||
| Oddmanout84 |
Posted: Mar 16 2009, 11:07 AM
|
||
|
Resident Alcoholic           Group: Advanced Members Posts: 1,033 Member No.: 3,693 Joined: Sep 25th 2008 Location: My garage, waiting for overnight part from JP |
I'll try to post a pic of the beam pattern once I finish shaving my car's butt. |
||
| TexasDemonZ |
Posted: Mar 16 2009, 03:40 PM
|
||
|
Request Title - PM Mods           Group: Members Posts: 421 Member No.: 2,359 Joined: Mar 6th 2008 Location: Austin, TX |
I seriously doubt they are hellas. And Unfortunatey I do not have a beam pattern. and using these bulbs, he'll pretty much have to convert the headlight wiring over to a relay setup. The stock setup runs directly from the light switch, and the voltage drains down to only about 9 or so volts at the headlights, that's one of the biggest reasons why S30 headlights are always so dim compared to newer non-HID headlights. The diamond cut pattern is a generic design used by around 75% of the companies who make these.  The ones I have are similar to his, but were sold by APC before they went bankrupt.  The standard headlight back in the time of the S30's was a Sealed beam type. The bulb was a part of the lens assembly. What he and I have are a lens assembly that doubles as a housing for a capsule styled bulb. In this case the 9003/H4 They're a dime a dozen, and all look pretty close to the same, the style he has is one of the most popular. They housings are for sure not Hellas, and I doubt the bulb is either. Whether or not they were based on a design that was originally used by hella, I dont know. But I know these are not Hellas |
||
| Oddmanout84 |
Posted: Mar 16 2009, 04:42 PM
|
||
|
Resident Alcoholic           Group: Advanced Members Posts: 1,033 Member No.: 3,693 Joined: Sep 25th 2008 Location: My garage, waiting for overnight part from JP |
Yeah, as stated before, I got a relay harness at the same time as the lights. Both are installed. Only I think I had a better idea when I installed the harness. Instead of taking power directly from the battery to power the lights (as the instructions say), I routed both relay switches through a couple fuses first. I may not have had to cut and splice any wires during my experience (what most people complain about when they mention the blackdragon kit), but in doing so the lights will be harder to completely remove from the car. I think I may end up cutting the wires near the bulbs and installing connectors so they can be more easily separated from the rest of the harness and the car. |
||
| JDMMA70 |
Posted: Mar 16 2009, 05:06 PM
|
|
Request Title - PM Mods           Group: Advanced Members Posts: 786 Member No.: 123 Joined: Apr 7th 2007 Location: Houston, TX |
Hmmm ive heard bad things about those Generic Lamps *shrug* but i have to ask why not just buy Hella or Cibie lamps? Thats what most of the FC, and Supra guys do.
|
| Oddmanout84 |
Posted: Mar 16 2009, 06:01 PM
|
||
|
Resident Alcoholic           Group: Advanced Members Posts: 1,033 Member No.: 3,693 Joined: Sep 25th 2008 Location: My garage, waiting for overnight part from JP |
Most of what Hella offers are upgrades from sealed beams to casings that allow replacements of the bulbs instead of the whole assembly (like what I have). However, most of these are not MSR (multi surface reflectors) with a clear lens like what's on my Z. The other 7" lenses that hella offers are really foglamps, which won't project as focused a beam. I'm not a "headlight scientist" or anything but I think the MSRs I got are better suited to what I'm using them for (though they may be retrofitted foglamps themselves, who knows). And I think they look nice. And they're a bit cheaper. Honestly I have no experience with hellas or cibie lamps so maybe I'll give them a shot down the road if these casings turn out to suck. |
||
| JDMMA70 |
Posted: Mar 16 2009, 07:06 PM
|
|
Request Title - PM Mods           Group: Advanced Members Posts: 786 Member No.: 123 Joined: Apr 7th 2007 Location: Houston, TX |
Im running Hellas and they are technically for offroad (Rally Lights) use only but they are E-Code lamps (European Code) which have a cut to the right to help illuminate sidewalks in other words they SHOULD be Super Legal here as DOT spec lamps like Sylvania Silverstars are complete trash. In other words these are what came standard for the EDM market.
 You should get these because the 7" lamps have the same lens pattern and they will have a great cutoff with a halogen bulb. Sylvania SilverStars Sealed Beam 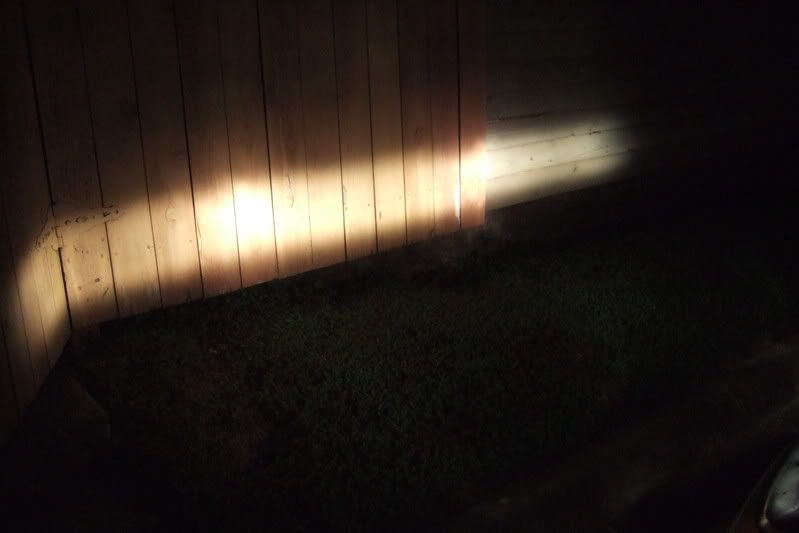 Hella E-Codes w/ Phillips Xtreme Power Bulbs 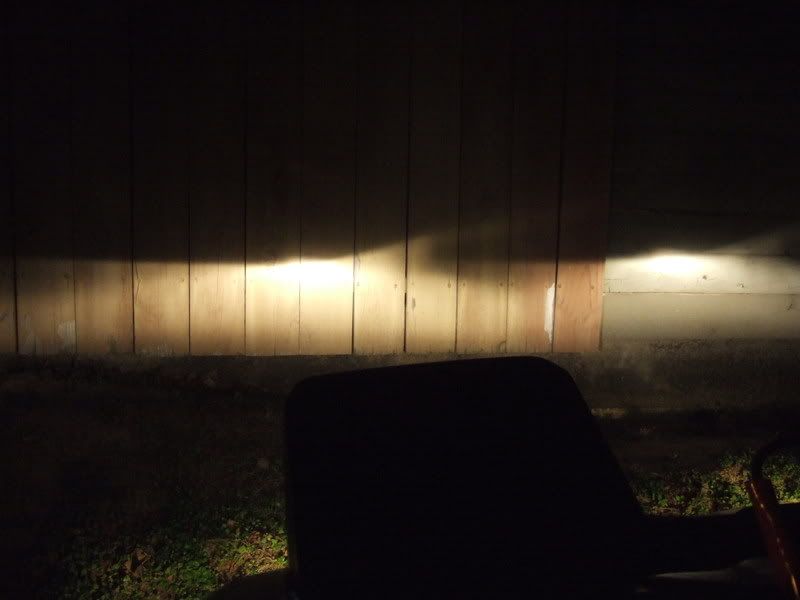 Hella E-Codes w/ 8000K HID Kit (w/ Glare Shields) 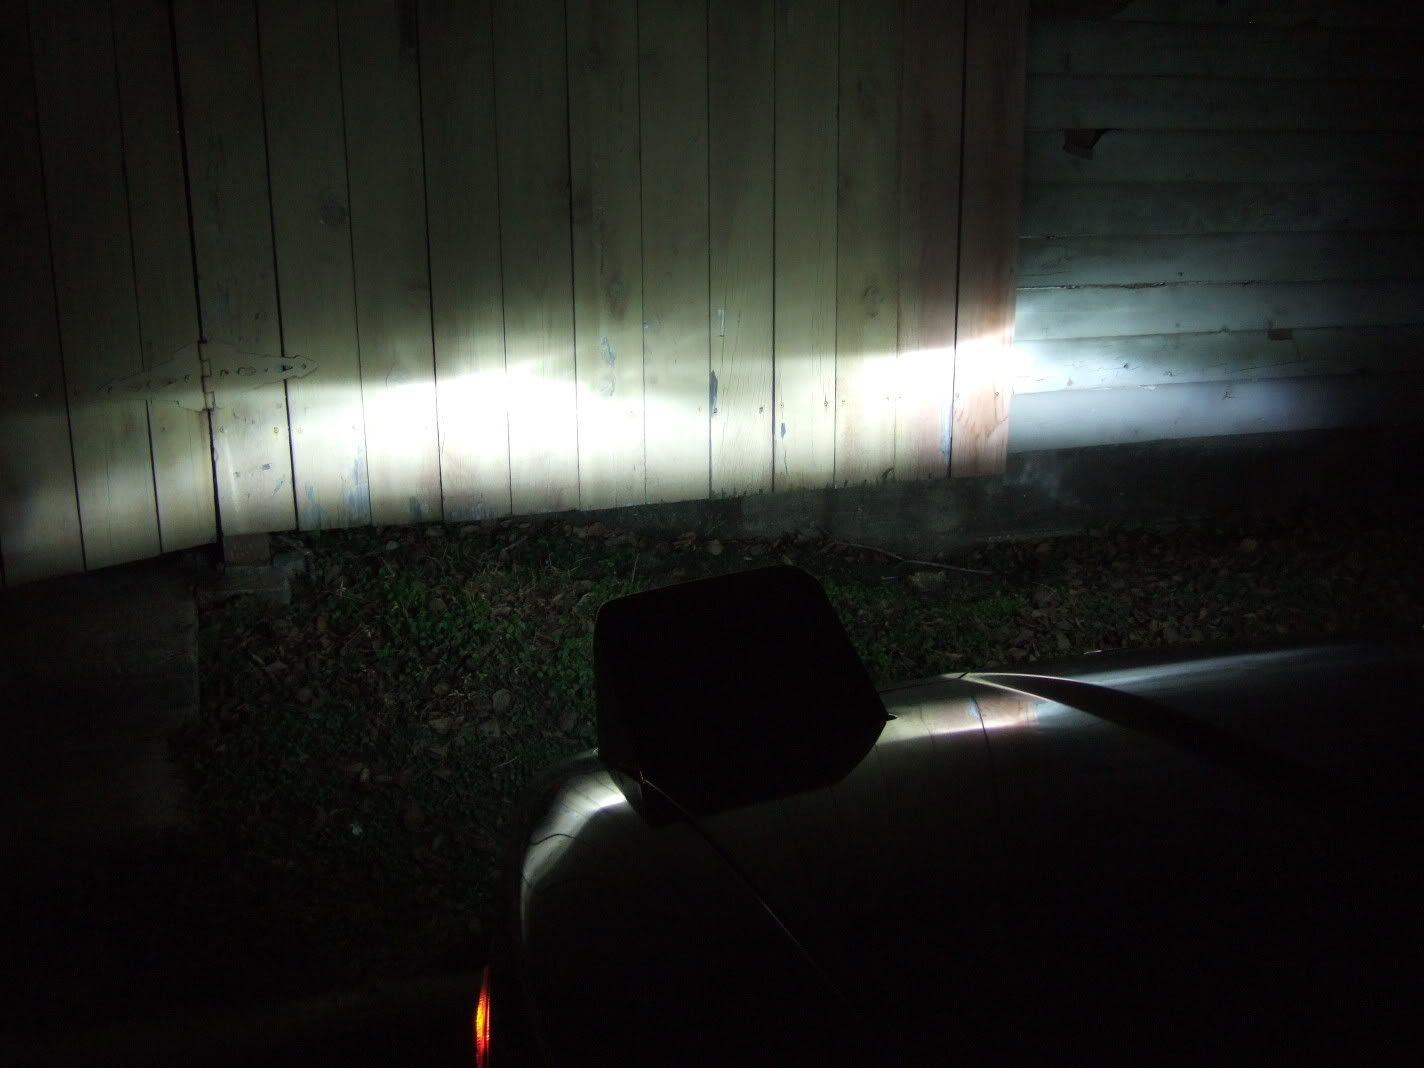 eBay Diamond Cut Lamp  On wall about 10ft away eBay housing on Left, Hella housing on Right  Im running the same Headlmaps and my pics of the beam pattern is closer to show the cuttoff and how direct it is. But as you can see the dimaond cut lamps scatter light around and thats not good for other drivers coming the opposite direction. In all honesty ive seen eBay lamps in person are they are complete and utter crap, i dont know about yours since i dont know much about them but i do know eBay lamps are glare monsters from hell. This post has been edited by JDMMA70 on Mar 16 2009, 07:12 PM |
| rx-666 |
Posted: Mar 16 2009, 07:55 PM
|
|
WME King Tiger           Group: Advanced Members Posts: 1,675 Member No.: 3,627 Joined: Sep 14th 2008 Location: co |
i had those same ebay lights, but the yellow ones, on my fd, they looked about the same, only yellower. not the greatest but sadly slightly better than stock
|
| Oddmanout84 |
Posted: Mar 25 2009, 08:04 AM
|
|
Resident Alcoholic           Group: Advanced Members Posts: 1,033 Member No.: 3,693 Joined: Sep 25th 2008 Location: My garage, waiting for overnight part from JP |
Update:
I feel kinda slackerish for not posting any updates for a while, but trust me, its been nothing exciting. The wait will be worth it when I do finish me current part of the project. |
| JDMMA70 |
Posted: Mar 25 2009, 01:27 PM
|
|
Request Title - PM Mods           Group: Advanced Members Posts: 786 Member No.: 123 Joined: Apr 7th 2007 Location: Houston, TX |
this post is worthless without pics
|
| Oddmanout84 |
Posted: Mar 25 2009, 03:11 PM
|
||
|
Resident Alcoholic           Group: Advanced Members Posts: 1,033 Member No.: 3,693 Joined: Sep 25th 2008 Location: My garage, waiting for overnight part from JP |
Oh, I see how it is!! You're going to make me waste precious time and memory card space to prove myself, lol. Poor 56k users... Alright, but its not going to be exciting... I already posted this hint-pic in another thread, but here it is again; 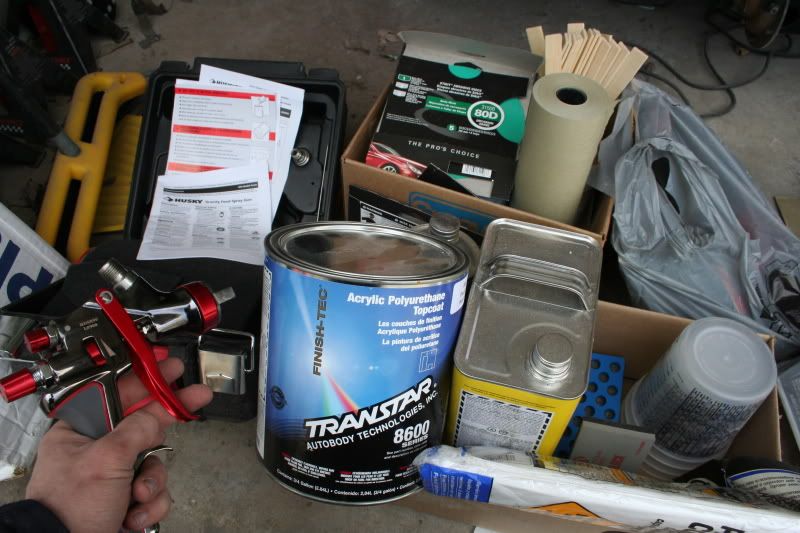 Can't see the color label? Hmm... how thoughtless of me... As you can see though, I reneged me previous decision to paint the car with that Duplicolor Paintshop brand. After weeks of looking at posts citing that the product (as with all lacquer based paints) TOTALLY SUCKS, I finally caved. If I were painting a classic car for shows that would only see a few days of sunshine a year, maybe I would have. It has the best shine around. But it also deteriorates the quickest. Unacceptable for what's going to be my DD, AND the paint I got was actually cheaper. I finally decided to go for single-stage polyurethane base, for durability and what seemed like the next easiest paint to spray for a total paint-noob. So, we'll see... Hopefully I don't waste the stuff and do a decent job. Also got an HVLP gun to shoot the paint. Sooo... lots and lots of prep work is still ahead. If I didn't have my air powered DA sander, I think I would have killed myself already. 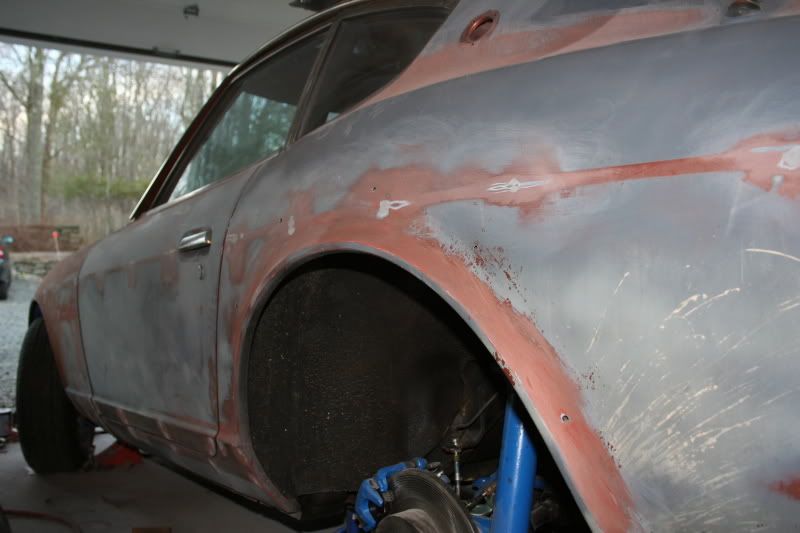 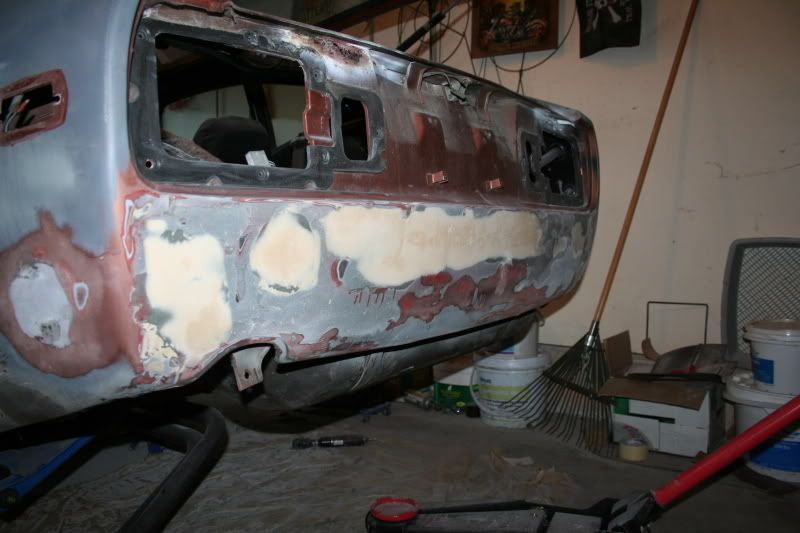 Every time I open the can of filler, a little part of me dies inside. I'd much rather be welding new metal in, but once again, I haven't welded crap since 8th grade... and I don't have a welder, or a friend with a welder (besides my friend's bro... but his shop is miles away and I decided to make the car roadworthy before I register). Luckily, what you see here is the waterproof variety, with a very thin layer of bondo gold on top to smooth it out. Even short strand FG filler is too rough when sanded, usually. The holes were patched with fiberglass cloth and resin for the back, then covered with 3m rubberized undercoating (same method as Globerunner's Z). 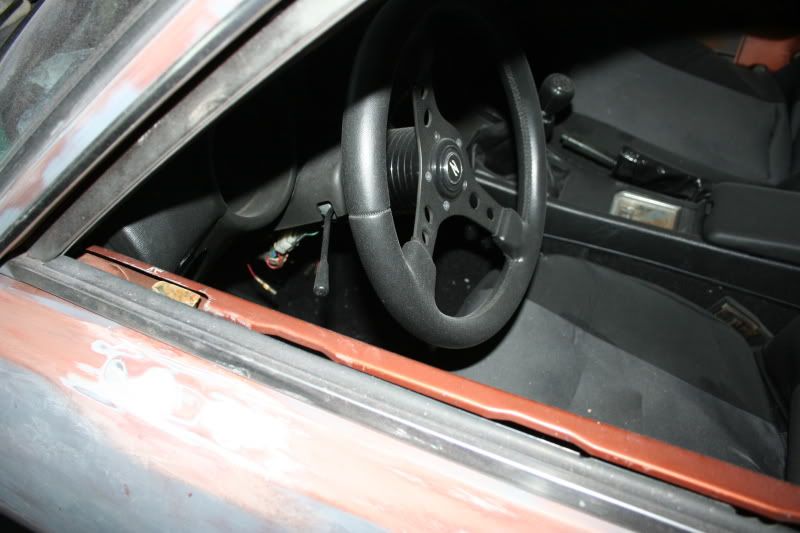 Look Ma! No more Yankee mirror holes! And the missing e-brake brackets on my calipers arrived at Nissan today. Needless to say, my handbrake now actually locks the brakes. 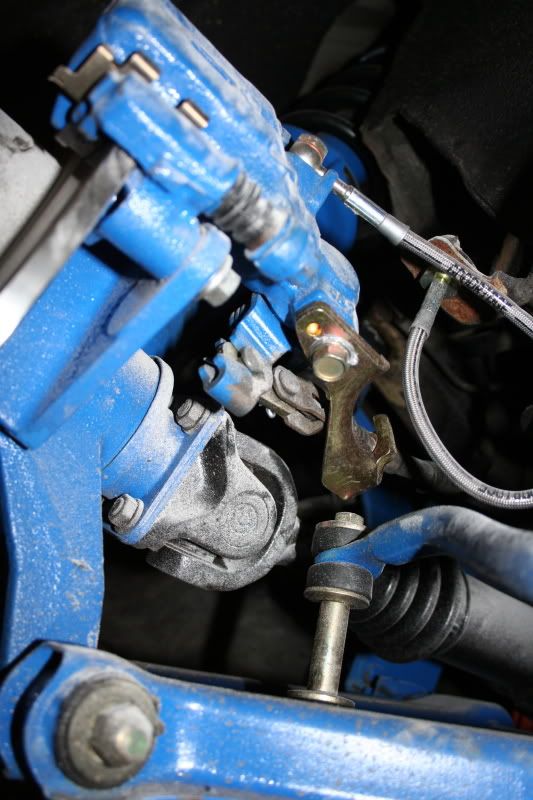 |
||
 24 Pages 24 Pages |
   |
Powered by Invision Power Board 1.3.1 Final © 2003 IPS, Inc.
