| Wangan Midnight Expressway · Forum Guidelines | Donation · Gallery · Soundtracks · Help · Search · Members · Calendar |
| Welcome Guest ( Log In | Register ) | Resend Validation Email |
 |
Thread Rating: 0 votes, 0.00 average. Rate:
| Globerunner513 |
Posted: Jan 14 2013, 10:10 PM
|
|
Wangan Legend  Group: Members Posts: 131 Member No.: 2,085 Joined: Jan 28th 2008 Location: Bellingham, Washington |
Hi everyone!
It's been a long time since I've posted on here. The new Initial D 5th stage brought me back to the site and figured I should update where my 280z has come in the past couple years. You can find my previous thread on the progress of the car when I first got it here: http://forums.hybridz.org/index.php?showtopic=72073 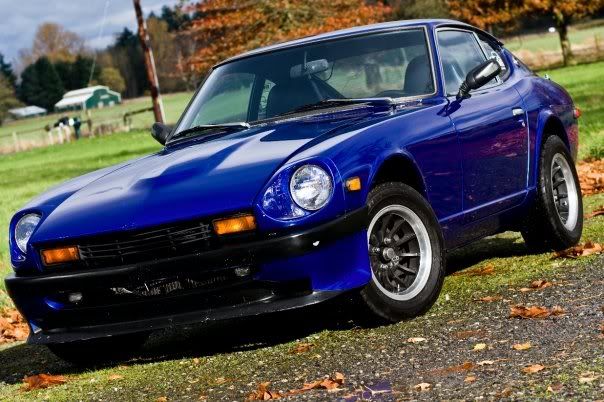 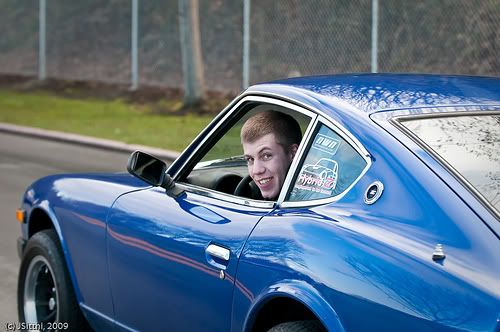 Back story: Got the car driving about a year after high school. Drove it as a daily driver since 2007 up to 2010, when it was parked for needing a new clutch and tires, tried to find the time but she ended up under a tarp from about April until January of this year when I finally got it in the garage and began work. 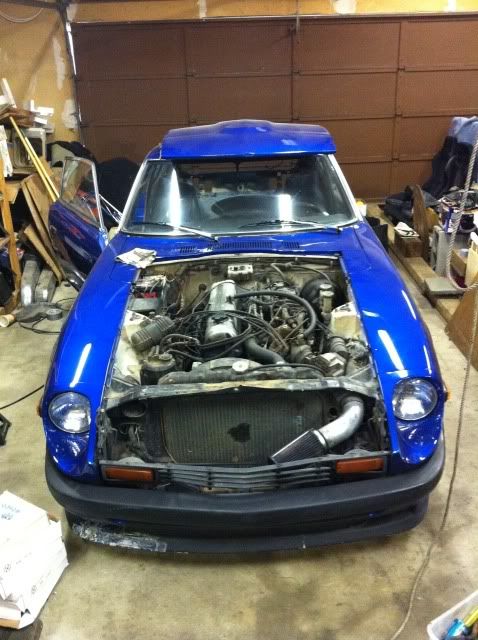 Took a wire wheel to the floor boards and sprayed a few coats of Rustoleum. 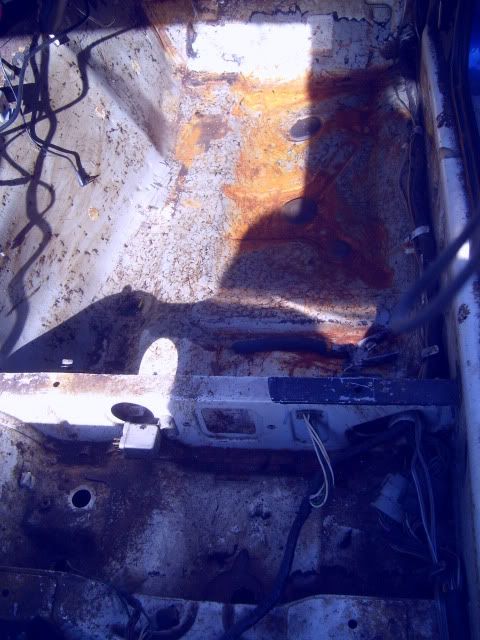 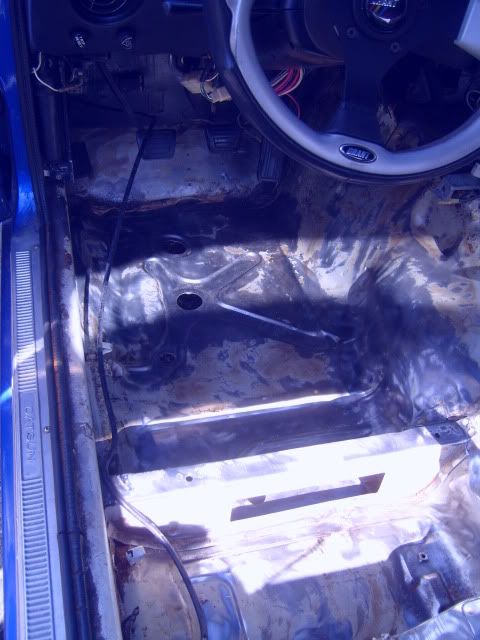 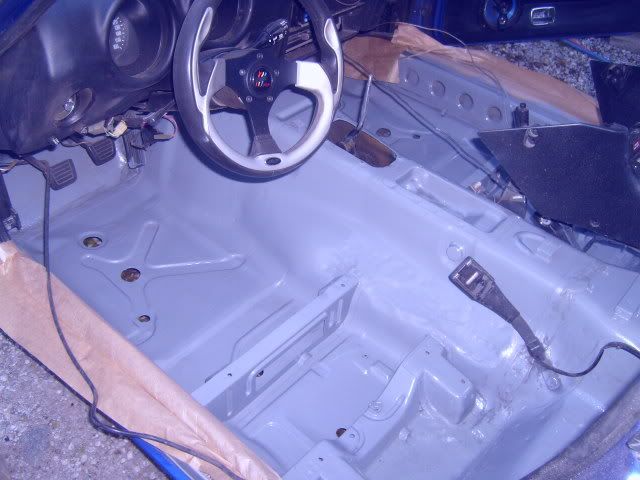 Then did the same to the rear wheel wells and hatch area. 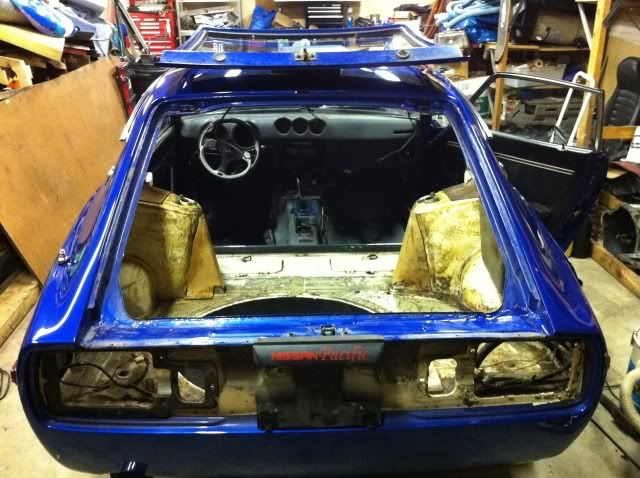 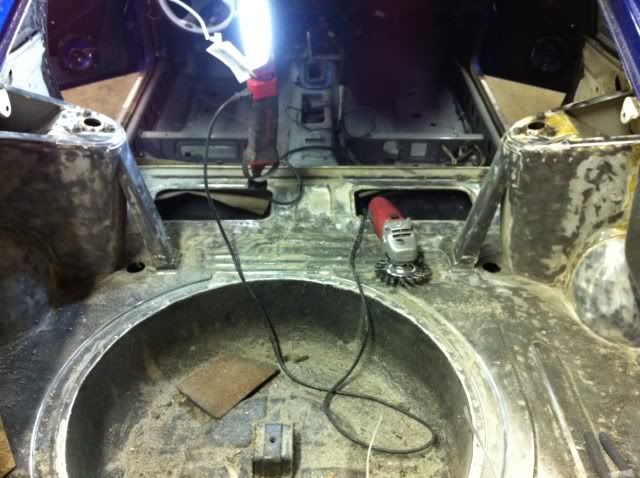 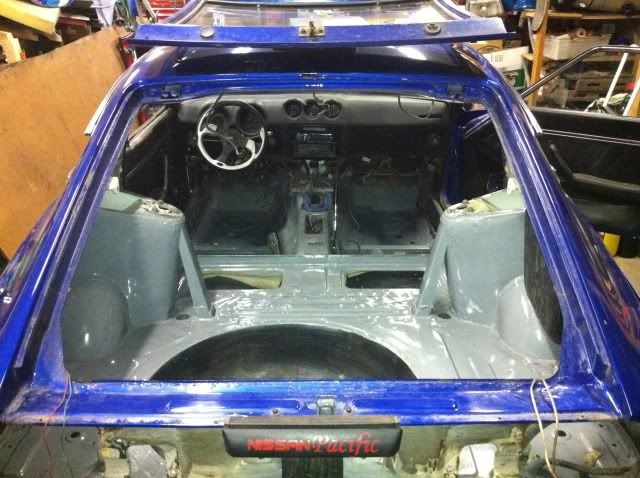 I've taken the transmission out a couple different times, each on my back on the floor. Didn't feel like doing that again, so I pulled the whole assembly. All it needed really was a clutch. This was the beginning of the "While I'm at it" syndrome. 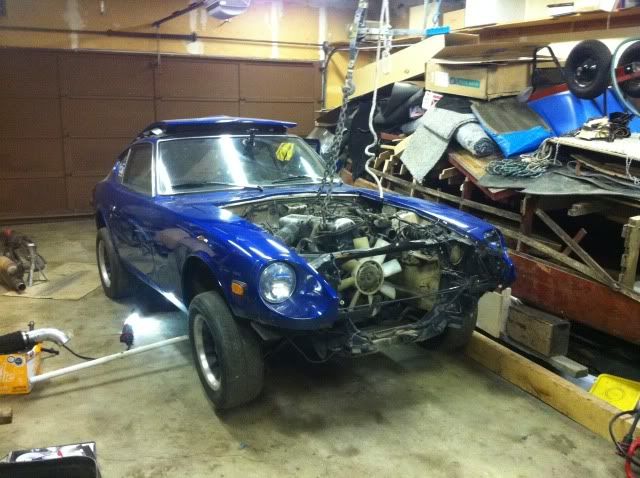 Time lapse video taking the engine out! http://youtu.be/kHXzf8KcVq4 With the engine out, I figured I might as well clean it up a bit. Found some rust under the battery tray so thought I should make sure there wasn't more else where. The beginning: 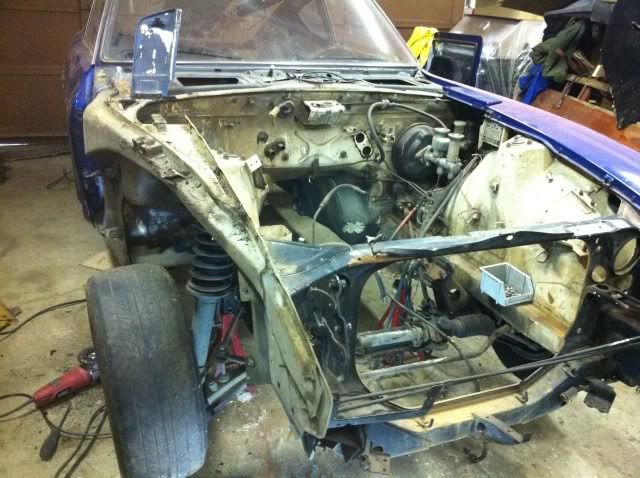 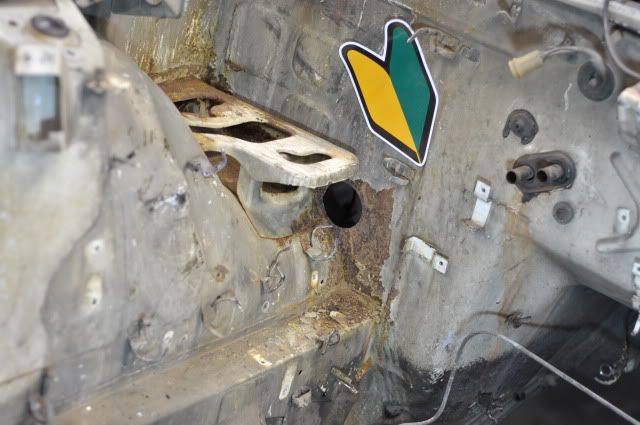 Dashboard out 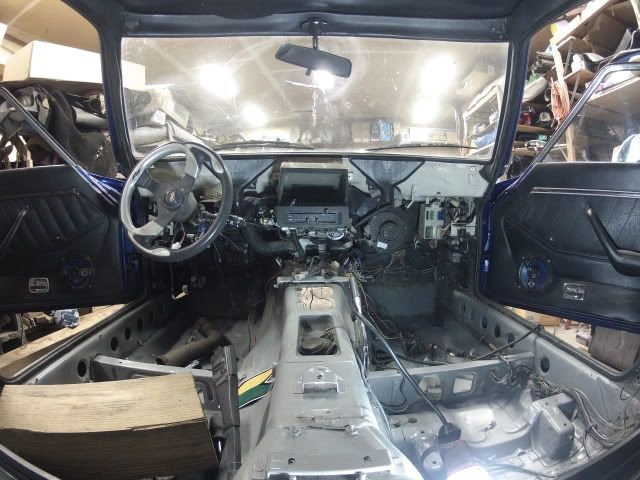 Passenger firewall 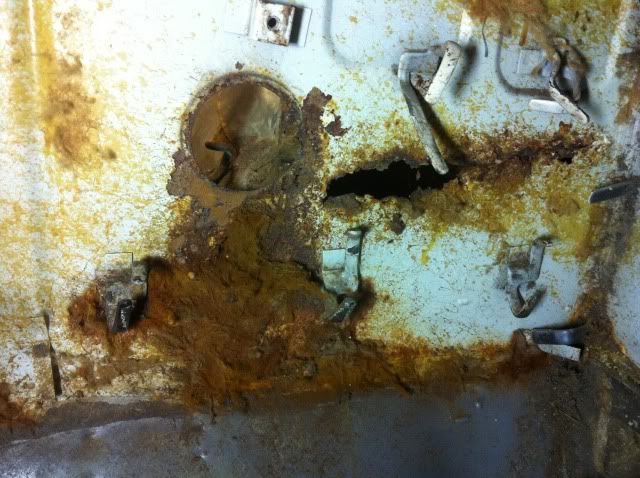 Ground down 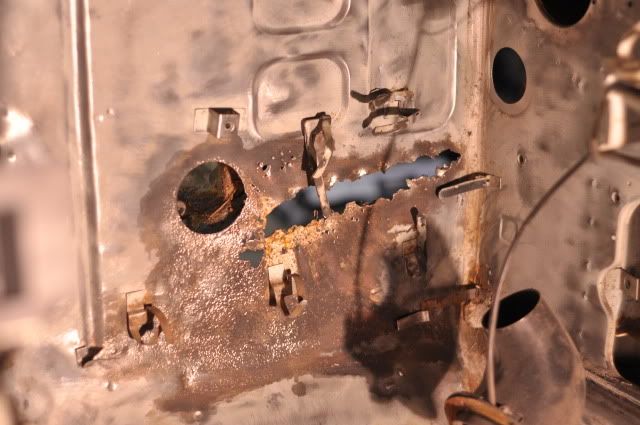 Removing the rubber undercoating with a pneumatic air hammer. Made quick work of it  Cleaned up from the outside. You can clearly see the rusted out area. I could use some advice of where to cut since that corner of the battery box needs to be replaced as well. 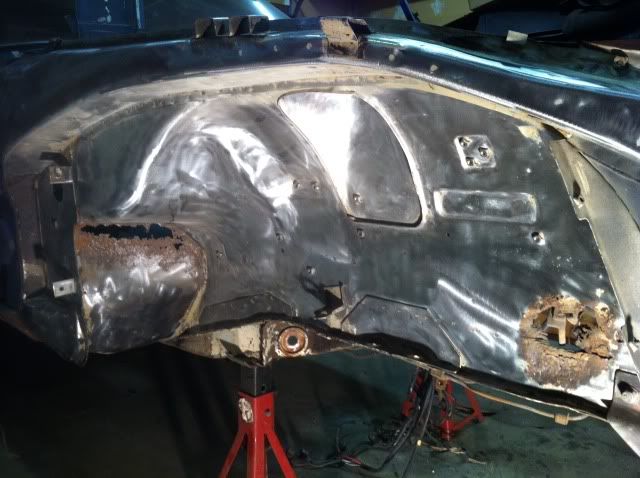 Driver side cleaned up as well. 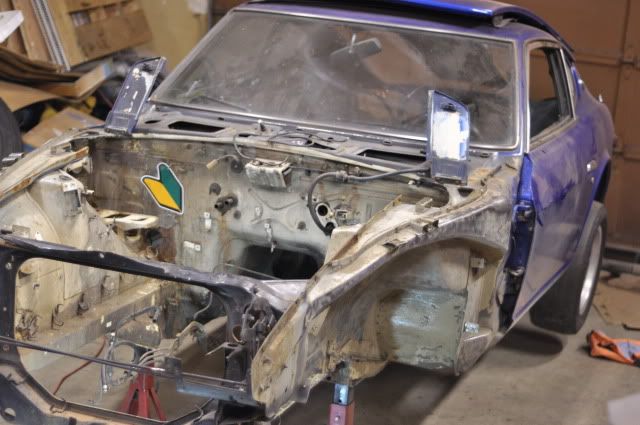 At this point I decided that since the car was already up on jacks and the front suspension was out, I might as well take out the rear and clean that area up as well. Rear diff and fuel tank out 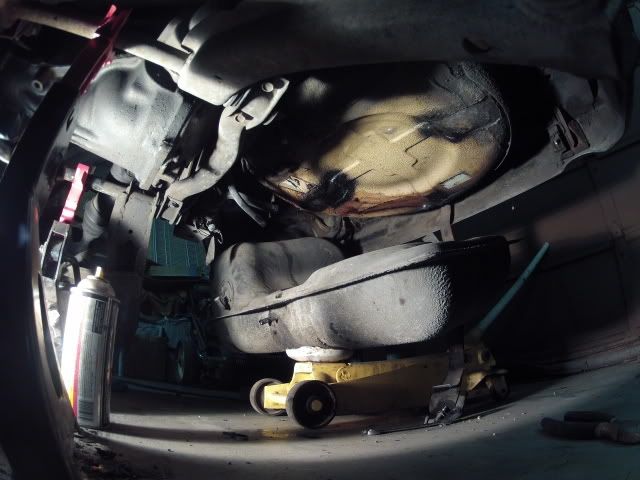 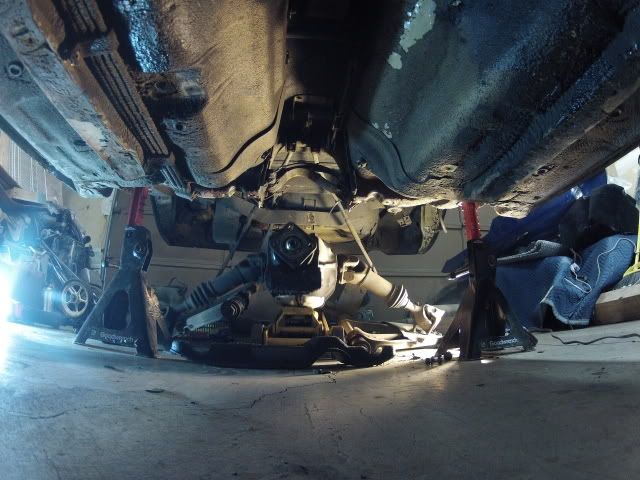 Cleaning up rear wheel wells 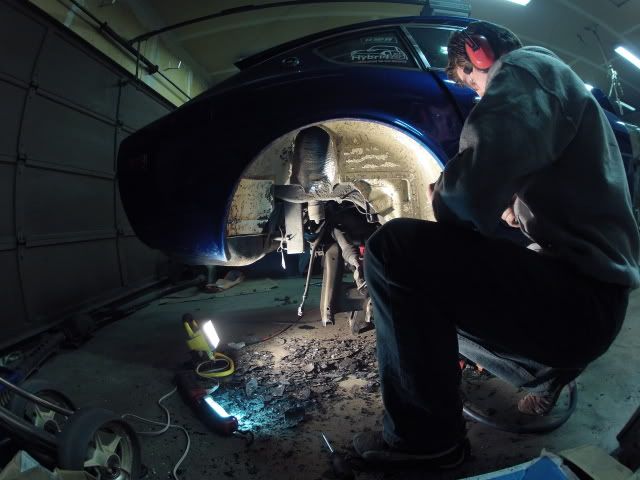 I bought a sandblasting pressure pot from the used/open box items at Harbor Freight. Took it home and it works great. 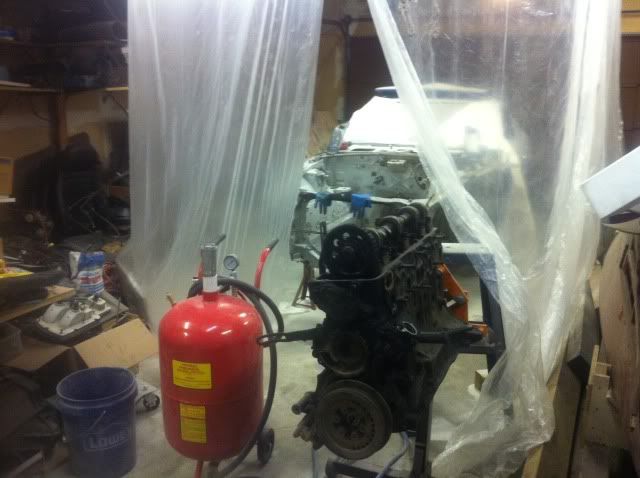 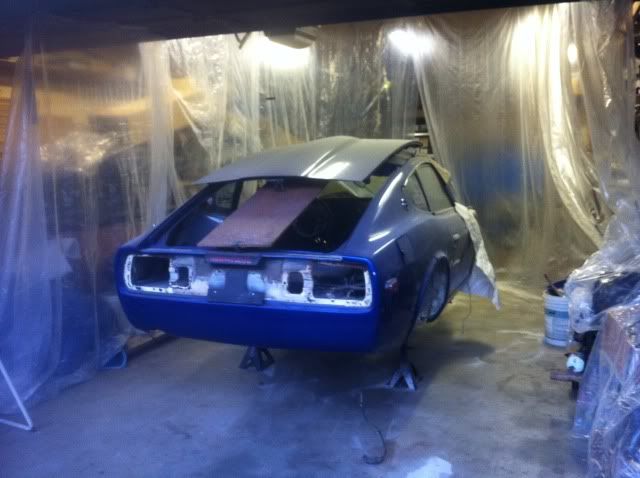 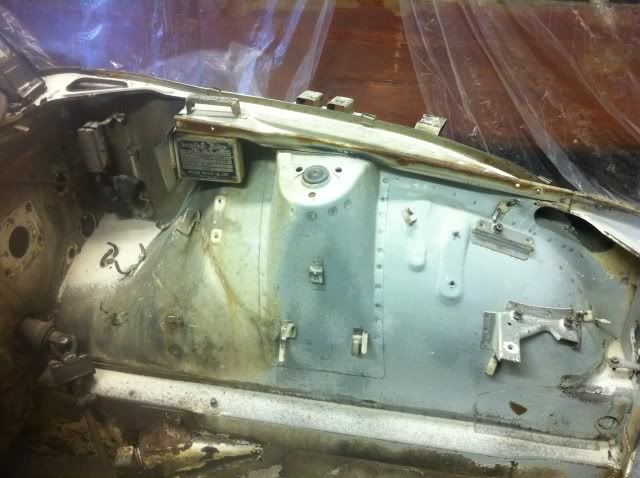 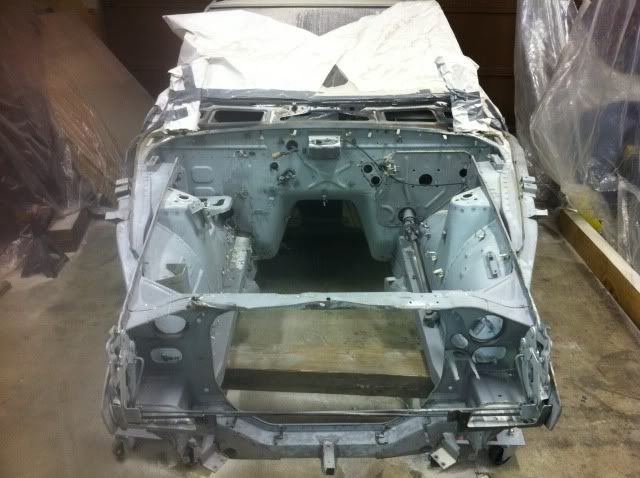 Not having a rotisserie was quite the test of patience. I found out I don't have any..lol Lying on my back trying to shoot up at the car, my mask would fog up after only a few seconds. I ended up using a set of ski goggles which worked great, but got scuffed up pretty quickly. Worked out in the end 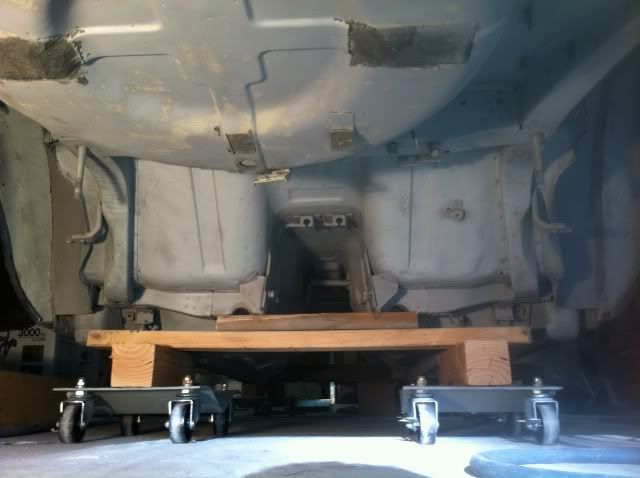 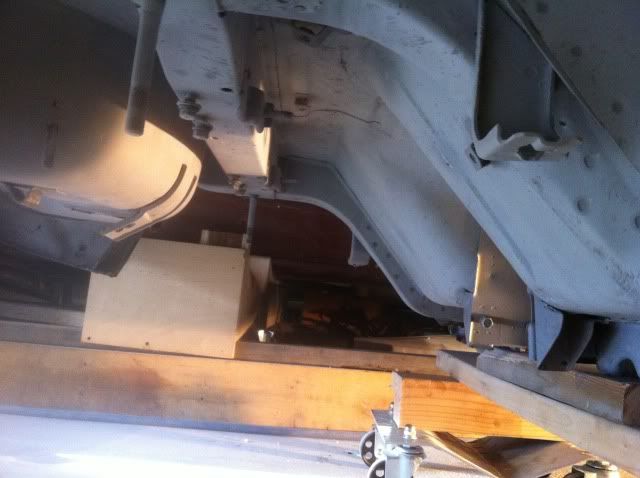 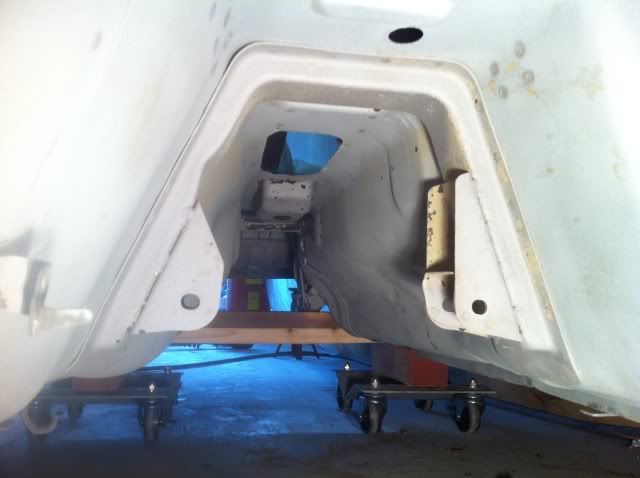 Driveline, suspension, mounts, and fuel/brake lines laid out to be cleaned or sandblasted as well. 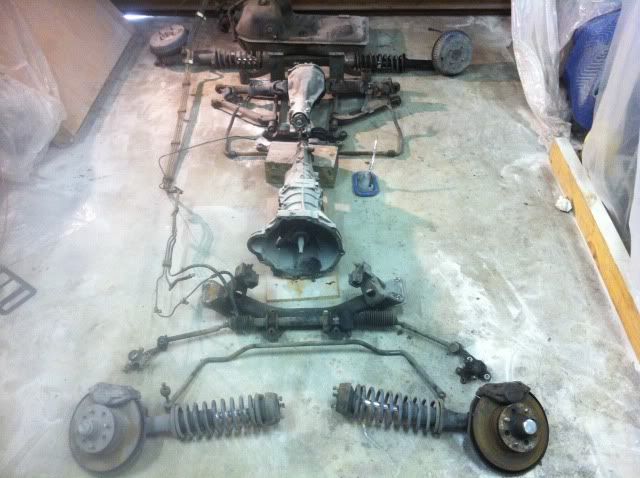 Now for some teasers of what's to come: 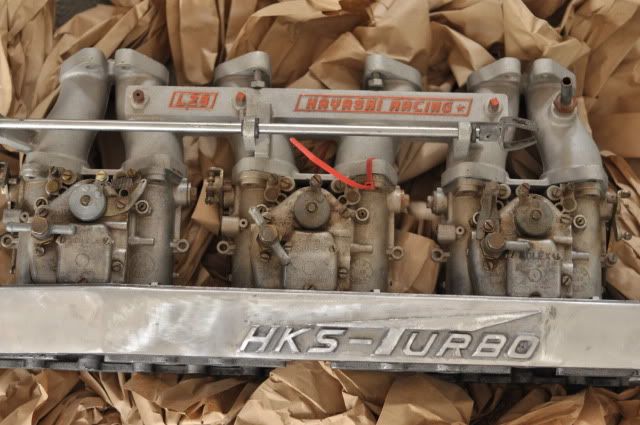 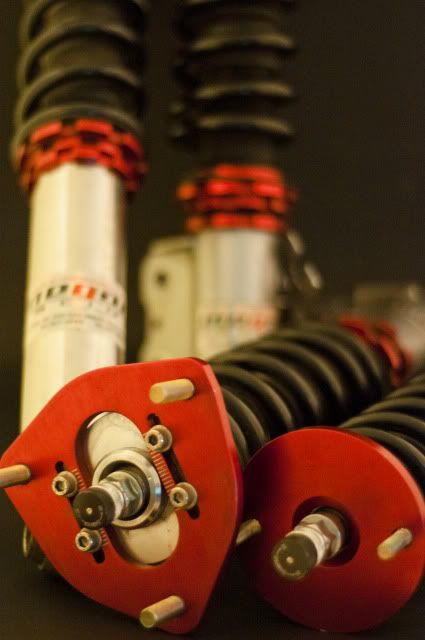 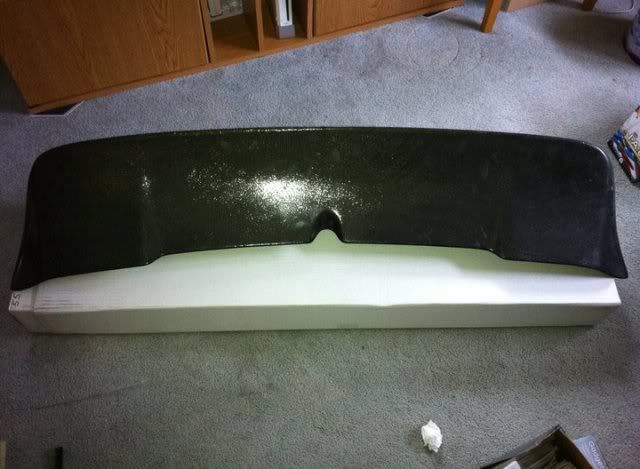 Sandblasted some parts.  This is from January to May 2012. At this point the progress pretty much stopped as I geared up to move to North Dakota to finish my studies. I'll be in Grand Forks, ND for about another year or so. Over the fall, the car went to a body shop to have some rust in the rear quarter panels fixed. The project took a bit of a turn when the shop engaged 'search-and-destroy' mode and completely stripped down the body. I delivered the car to them with a sandblasted front end and engine bay. They took it a step further by finding and fixing every ounce of rust possible, and sprayed something that looks like POR-15 (I need to clarify exactly what product was used) on the entire undercarriage and engine bay. I plan to paint the engine bay body color eventually. Battery tray and firewall rust cut out & replaced. 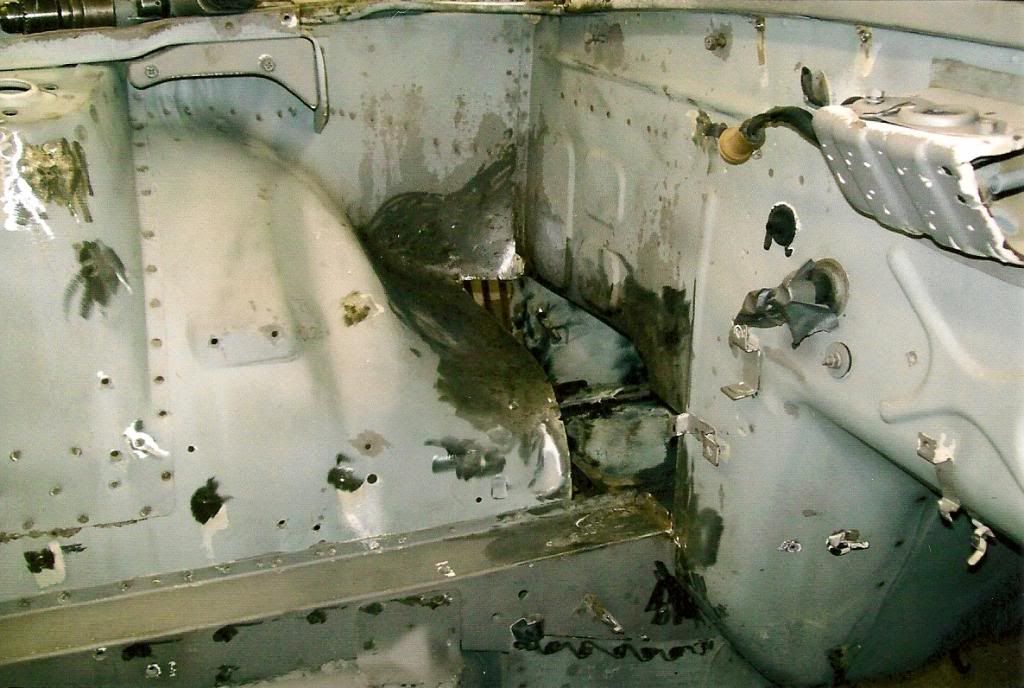  Hand made a replacement for the rear quarter panel area. 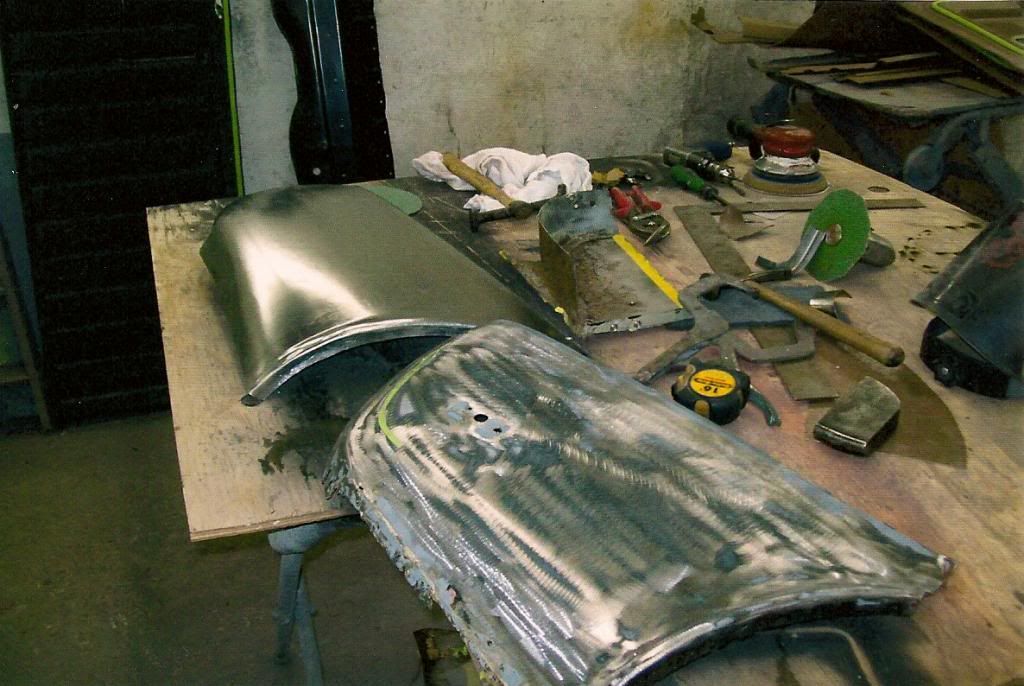 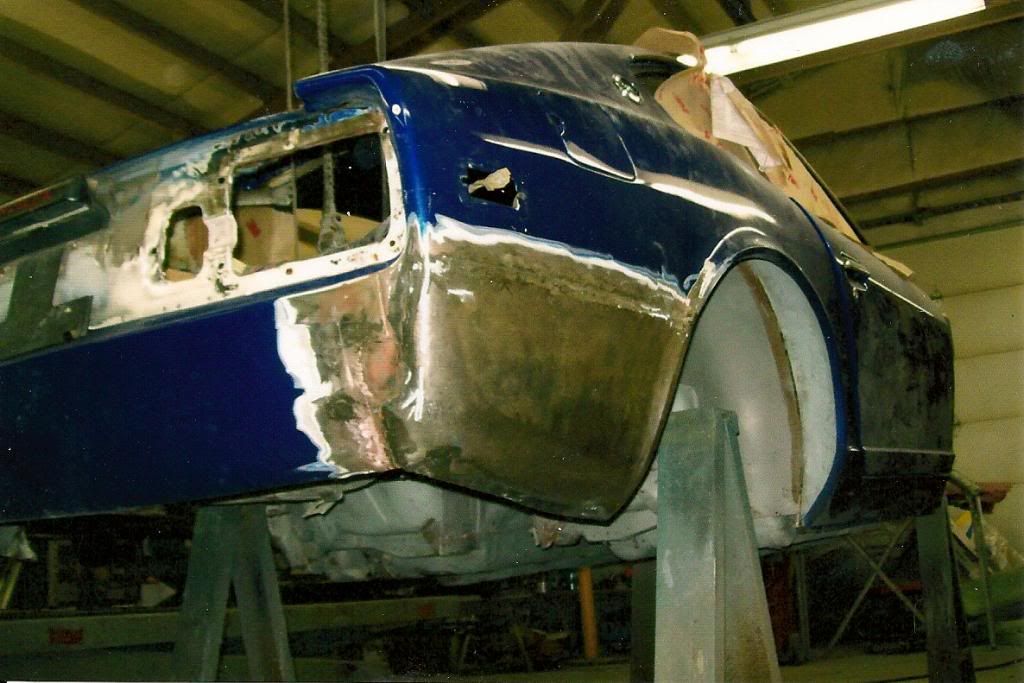 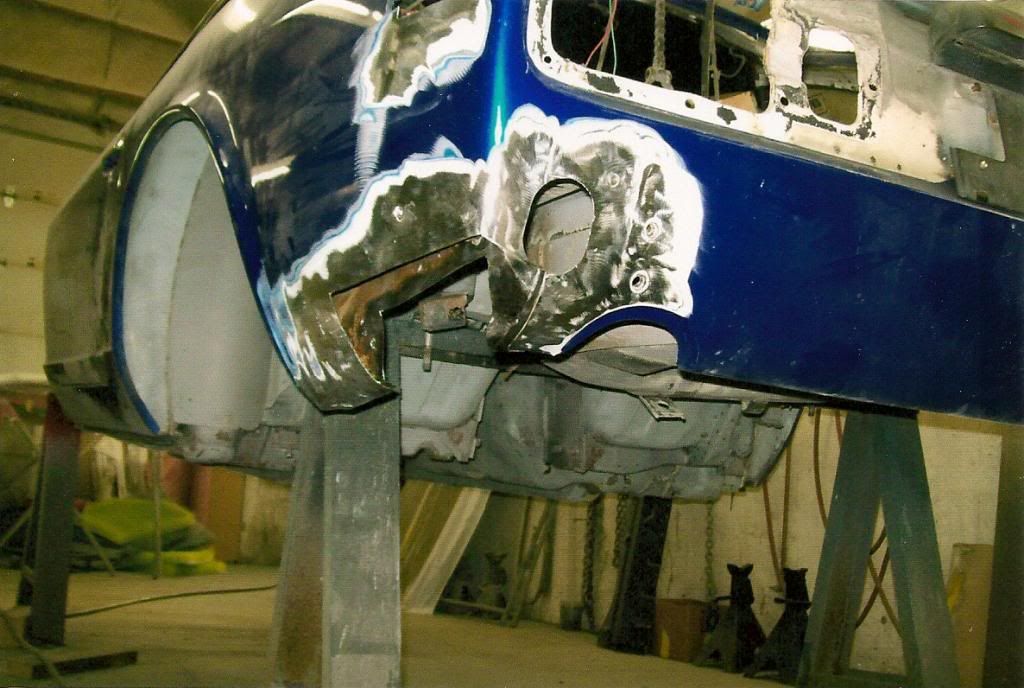 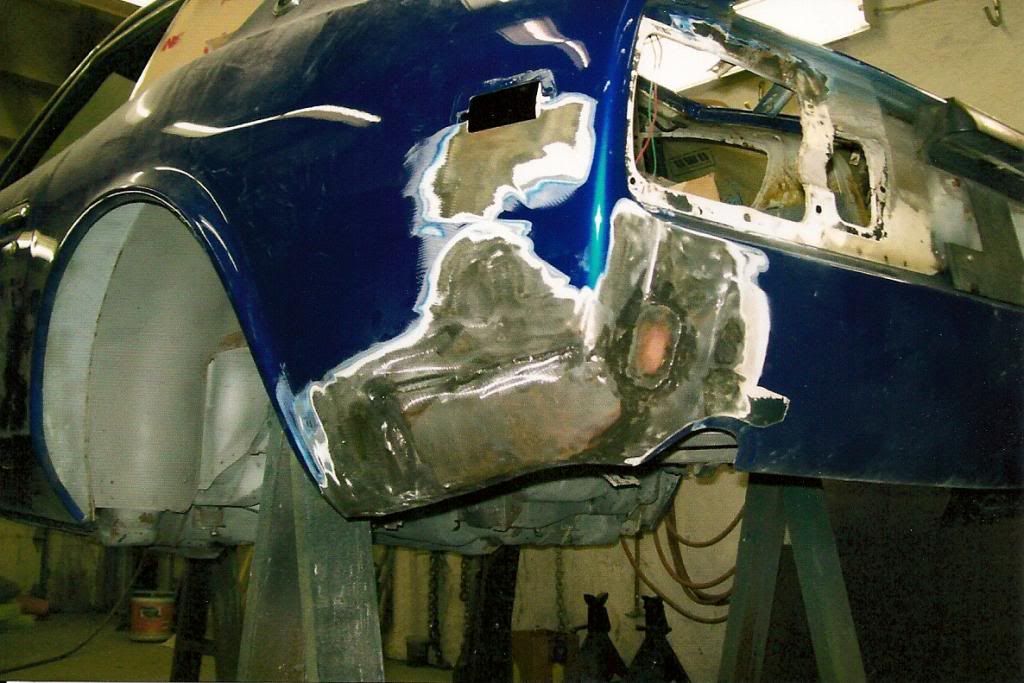 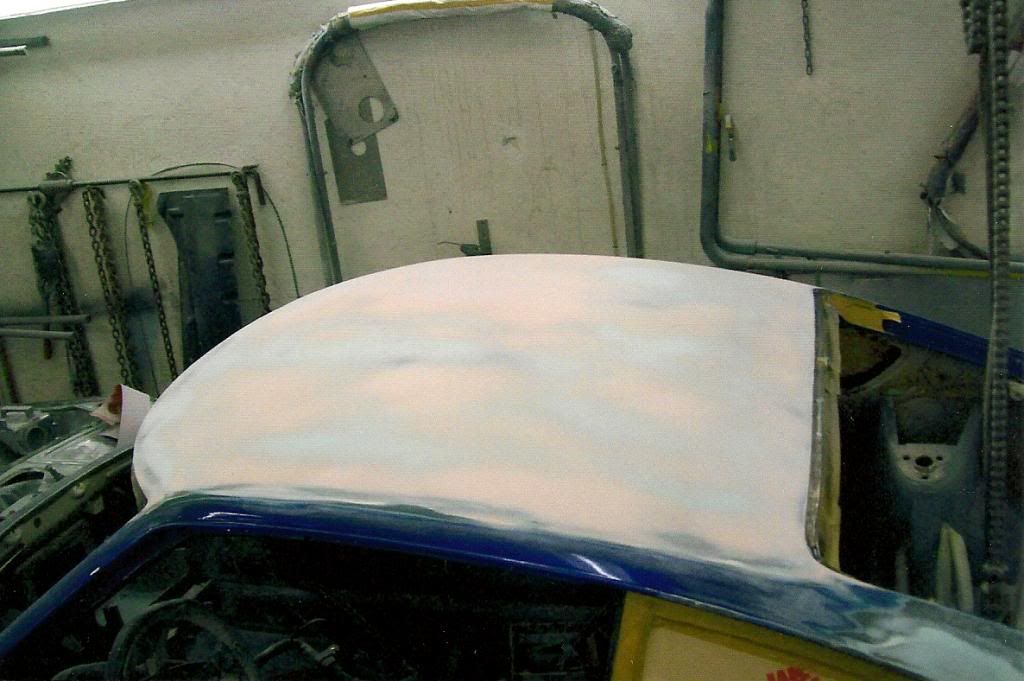 Imperfections in the roof area from the last paint job caused them to take the roof down to metal and re do the area. 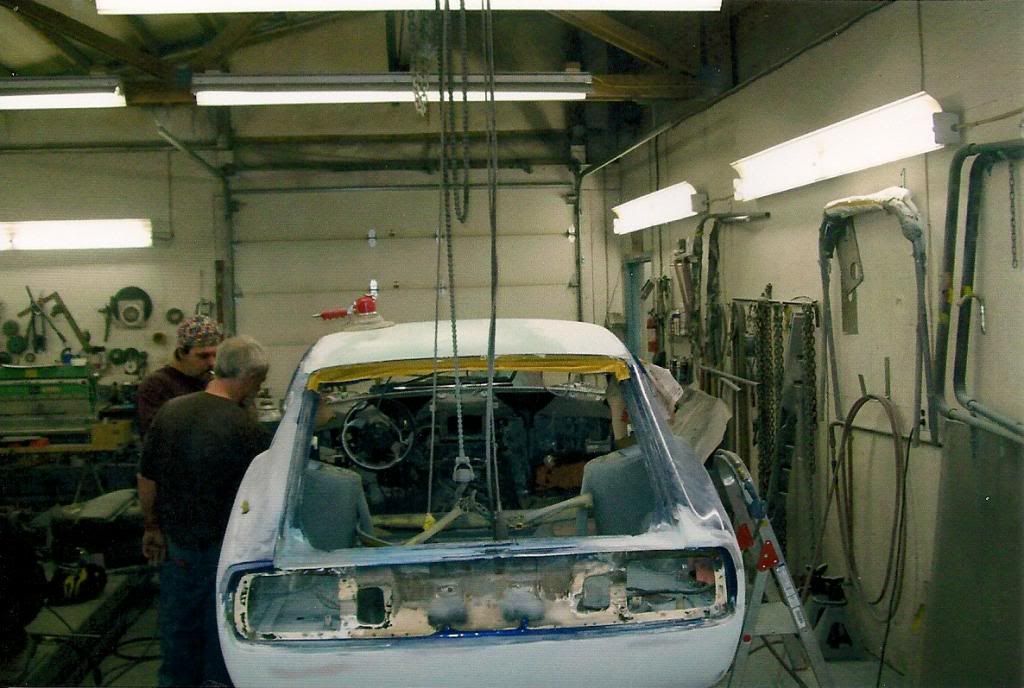 The rest of the body taken down to metal and re worked. 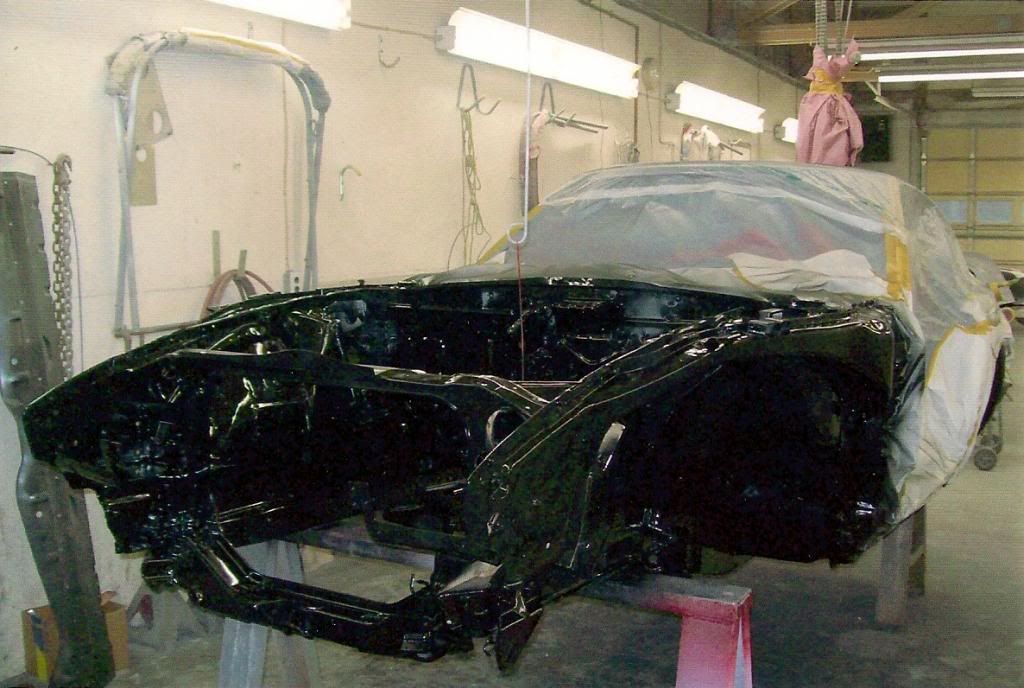 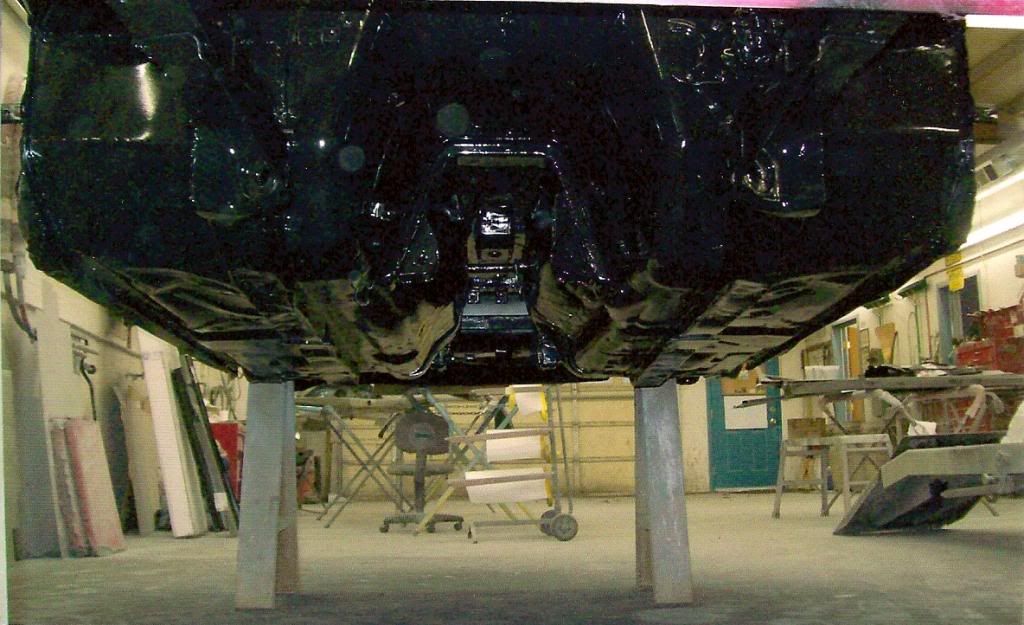 At a friend's shop to have S13 coilover adapters installed.  Coilover adapter sleeve installed vs stock strut assembly on the right. 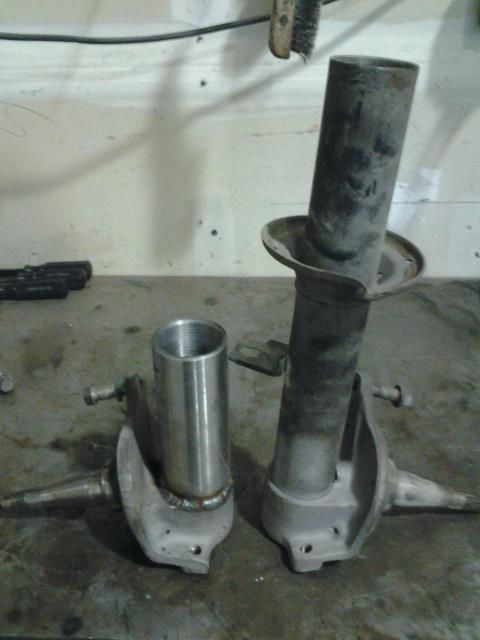 S13 Megan Coilover setup completed. 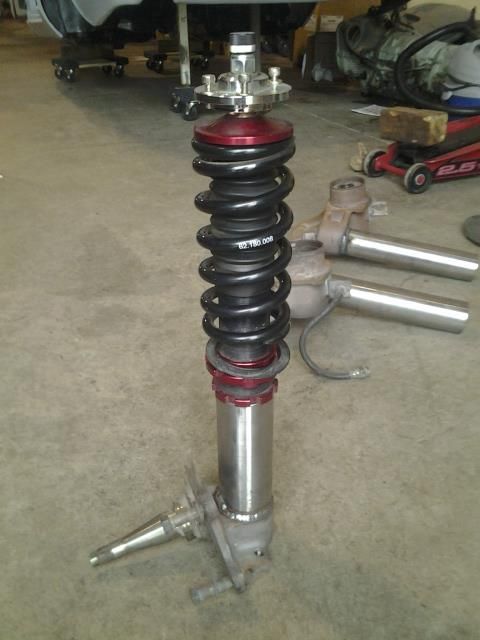 Front camber plates fitted flush to the strut tower. 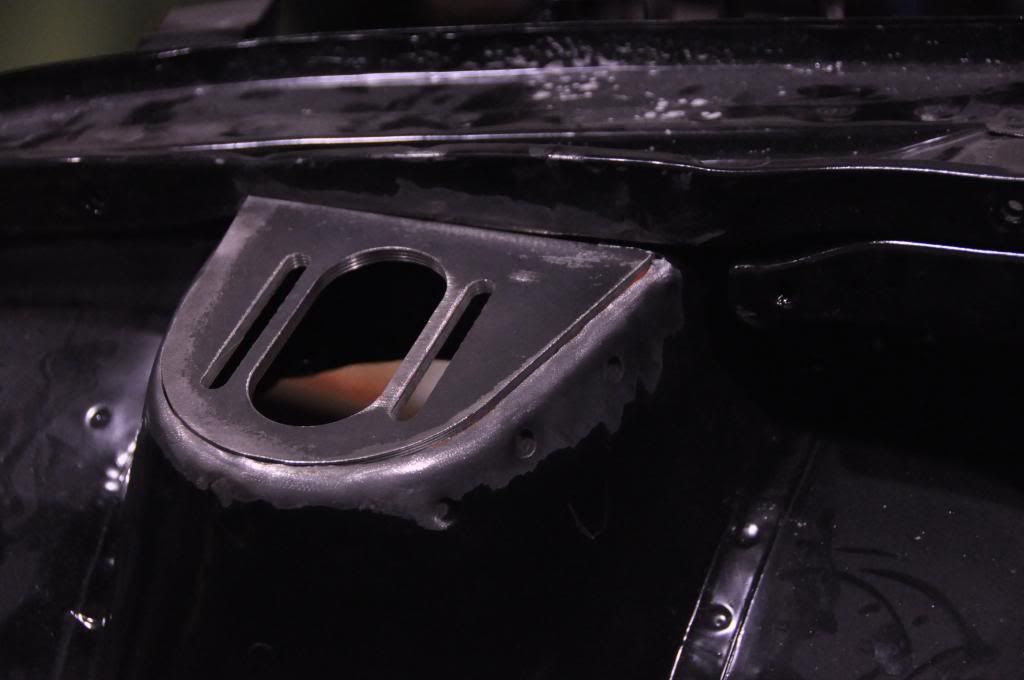 Welded in from above and below, and blended into the tower.  This thing will be LOW! 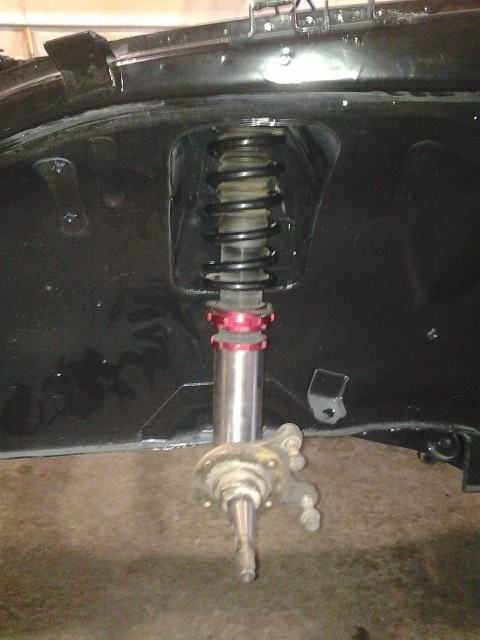 I won't have much more to update until I get some time to travel home again, but I'm excited for where this project is going. Also not picuted is the 4 point roll bar which has been installed (bolt in). A future possibility involves extending the roll bar to develop a simple roll cage. I'll keep you all updated as the project moves forward, thanks for looking!! This post has been edited by Globerunner513 on Jan 14 2013, 10:14 PM |
|
|
| Blue-Sensei |
Posted: Jan 14 2013, 10:25 PM
|
|
I have no idea what I'm doing Group: Advanced Members Posts: 1,074 Member No.: 7,637 Joined: Jan 16th 2011 Location: Virginia |
That's one hell of an overhaul.
|
|
|
| Globerunner513 |
Posted: Jan 18 2013, 10:20 AM
|
|
Wangan Legend Group: Members Posts: 131 Member No.: 2,085 Joined: Jan 28th 2008 Location: Bellingham, Washington |
haha thanks. It certainly got a bit carried away. Particularly considering the only reason it was in the garage in the first place was to replace the clutch....
|
|
|
| The J |
Posted: Jan 18 2013, 11:42 AM
|
||
|
The Immortal Kaos Emperor Group: ADMINISTRATOR Posts: 2,689 Member No.: 367 Joined: Jul 6th 2007 Location: In the right hand seat. |
obligatory
|
||
|
|
| PanzerAce |
Posted: Jan 19 2013, 08:49 AM
|
|
WME King Tiger Group: Advanced Members Posts: 835 Member No.: 2,725 Joined: May 1st 2008 Location: Merced, CA |
Nice.
|
|
|
| Nomake Wan |
Posted: Feb 12 2013, 05:31 AM
|
||
|
梓県警察峠部 Group: Core Members Posts: 1,094 Member No.: 223 Joined: Jun 11th 2007 Location: Orange, CA |
BUENO. Oh man I need to visit WME more often. So freaking bueno. God damn it you guys now I need another Z. ARGH. ARGH!!!  |
||
|
|
| Mr.K Z/28 |
Posted: Mar 13 2013, 04:36 PM
|
|
Legendary Emperor Group: Members Posts: 256 Member No.: 2,243 Joined: Feb 20th 2008 Location: riverside, ca |
thats some pretty heavy duty work going on with your car nice stuff.
|
|
|
| |
|
Powered by Invision Power Board 1.3.1 Final © 2003 IPS, Inc.